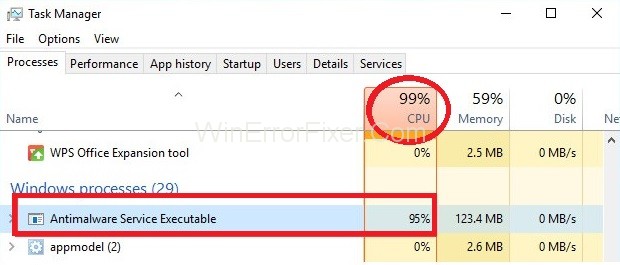
When Antimalware Service Executable is High on CPU then it isn’t an easy problem to fix. Thus we have a guide right here to deal with Antimalware Service Executable High CPU Usage Error. But first, let us understand what is Antimalware Service Executable.
It provides Windows Defender service, i.e., it allows Windows Defender to monitor your system continuously and provide protection against the Cyberattacks.
On the other hand, it leads to high CPU utilization, thus reducing the system’s performance. It performs the FULL SCAN of your system in which it is dependent on CPU, thus reducing the system’s efficiency.
4 Solutions to Fix Antimalware Service Executable High CPU Usage
So, if you are experiencing high CPU usage from a long period of time, then follow the below steps to Fix Antimalware Service Executable High CPU Usage issue:
Solution 1: Change the Windows Defender Scheduling
When Windows Defender is doing a full scan of the system, then the Antimalware Service Executable process utilizes high CPU Power. So, you can schedule the scans to take place at a particular time to reduce CPU utilization. Follow the below steps to schedule the scans :
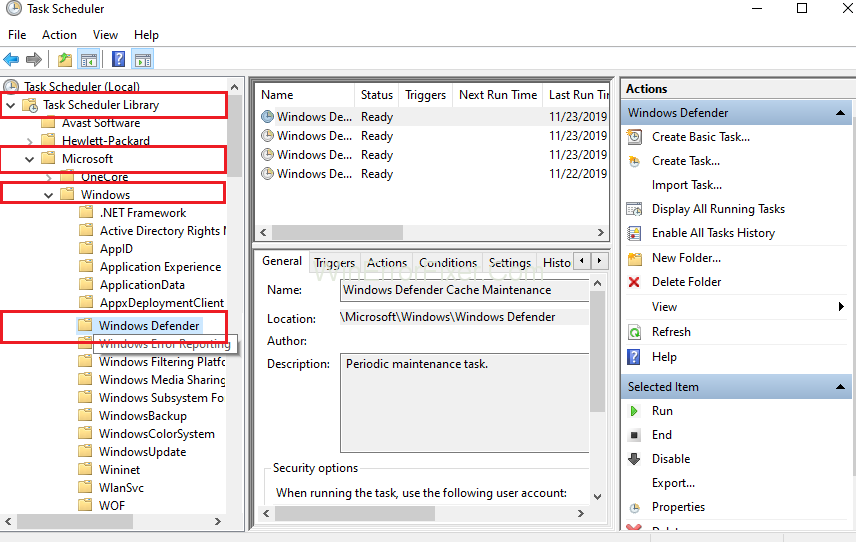
Step 1: At first, click on the Start button and type Task Scheduler. Now, click on option Task Scheduler.

Step 2: Task Scheduler window will appear. On the left side of the pane, double click on the folder Task Scheduler Library. Now, double click the folder Microsoft. Then click on Windows and at last double click Windows Defender folder. In other words, follow the path Library → Microsoft → Windows → Windows Defender.
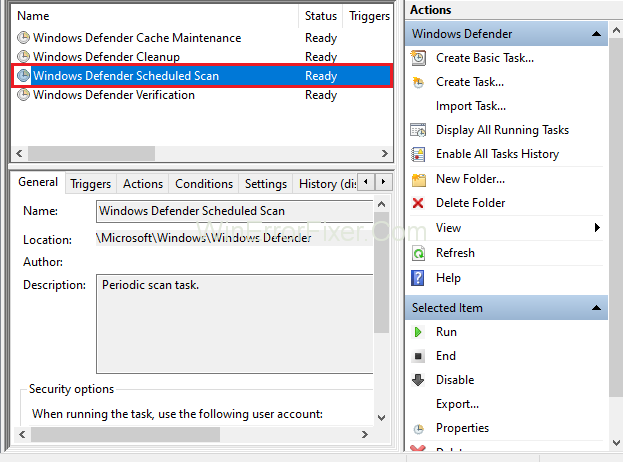
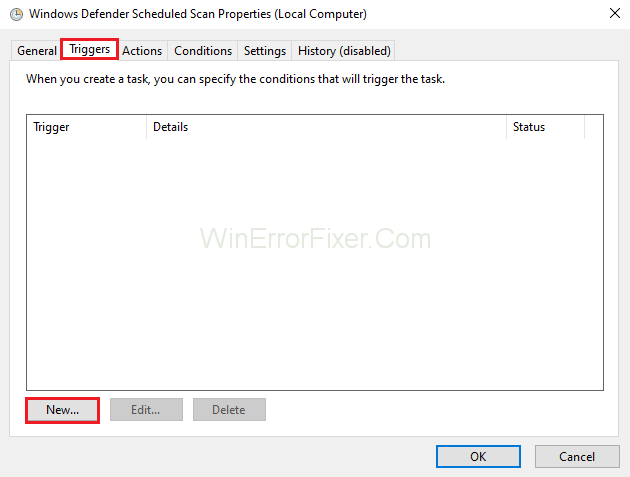
Step 3: The next step is to double click the Windows Defender Scheduled scan in the middle pane of the window.
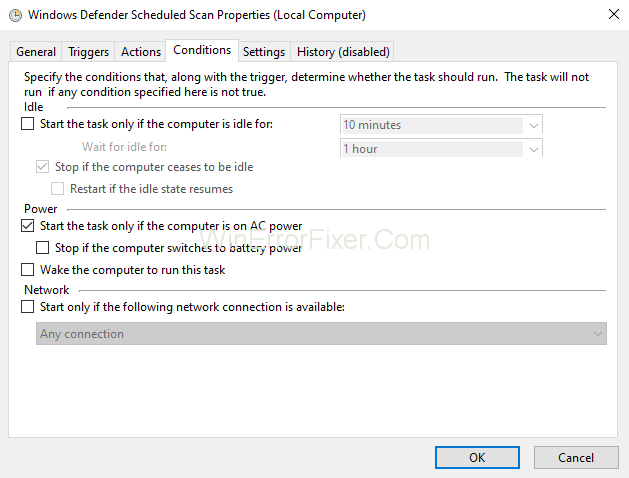
Step 4: MP Scheduled Scan Properties window will appear. Now, go to the Conditions tab and then uncheck all the options. At last, click on the OK button. All scheduled scans will disappear.
Step 5: Now, schedule new scans in such a way that the impact on your system’s performance is low. Therefore, again double click Windows Defender Scheduled Scan. Then choose the Triggers tab and click New.
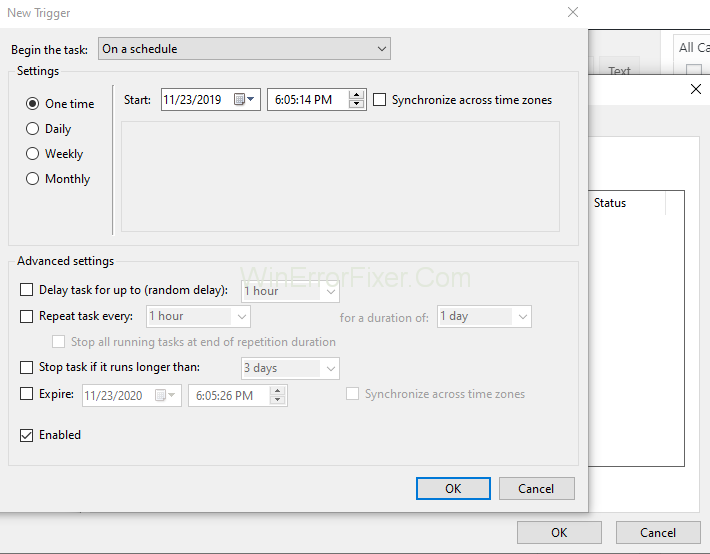
Step 6: Create a new scan schedule in such a way that there is a balance between system efficiency and protection. It’s better to schedule scans weekly for better performance of your system. At last, choose the day when scanning will take place.
Step 7: Follow the same process for following services located in the same path described above:
- Windows Defender Cache Maintenance
- Windows Defender Cleanup
- Windows Defender Verification
Solution 2: Disabling Windows Defender
Disabling the Windows Defender can help to fix the issue of high CPU usage, thus degrading the system’s performance. Follow the below steps to disable Windows Defender of your system:
Step 1: Open the Run box by pressing Windows and R key collectively from the keyboard.
Step 2: Now, type regedit in a dialogue box. Then, click on the Ok button.

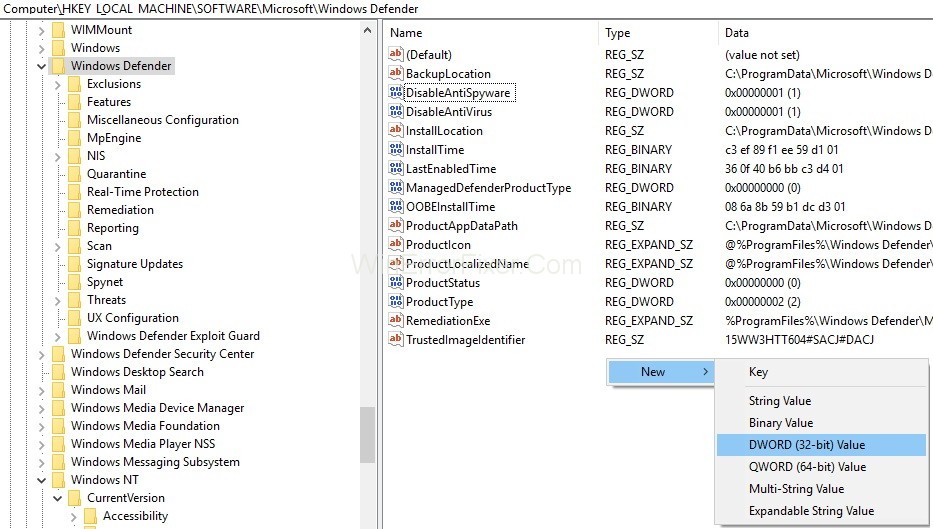
Step 3: Registry Editor window will appear. Now, browse the folders one by one by double-clicking on them according to the sequence: HKEY_LOCAL_MACHINE → Software → Policies → Microsoft → Windows Defender.
Step 4: Double click on registry entry named DisableAntiSpyware and set its value data to 1. If you don’t see a registry entry named DisableAntiSpyware, then right-click in the Registry Editor pane and then click on the New tab and then choose DWORD(32 bit) value.
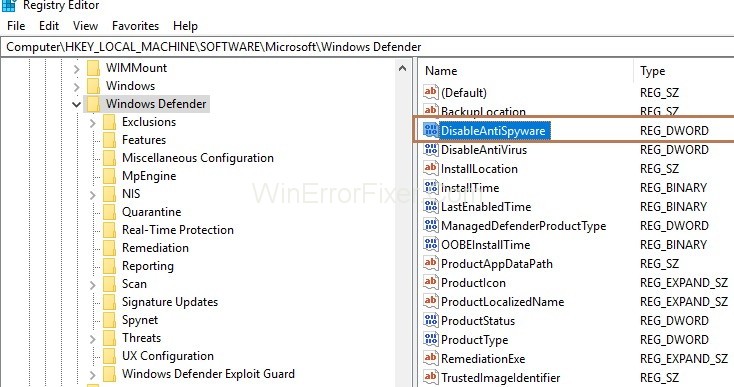
Step 5: The last step is to name this registry entry as DisableAntiSpyware. And then double click on it. At last, set its value data to 1.
Solution 3: Adding Antimalware Service Executable to Exclusions list of Windows Defender
Windows Defender scans each and every file, including itself, on your system. Thus, it results in some interesting interactions, and there is a system lag. So, to stop Windows Defender from scanning itself follow the below steps:
Step 1: At first, open the task manager by pressing Ctrl + Esc + Shift keys together. A list of processes will appear.
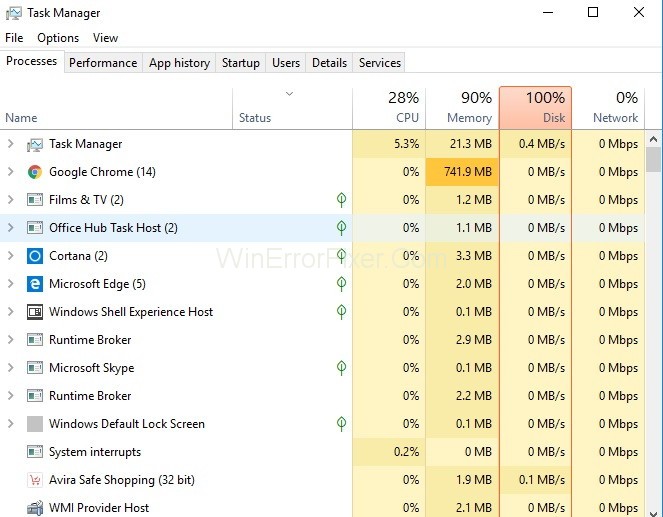
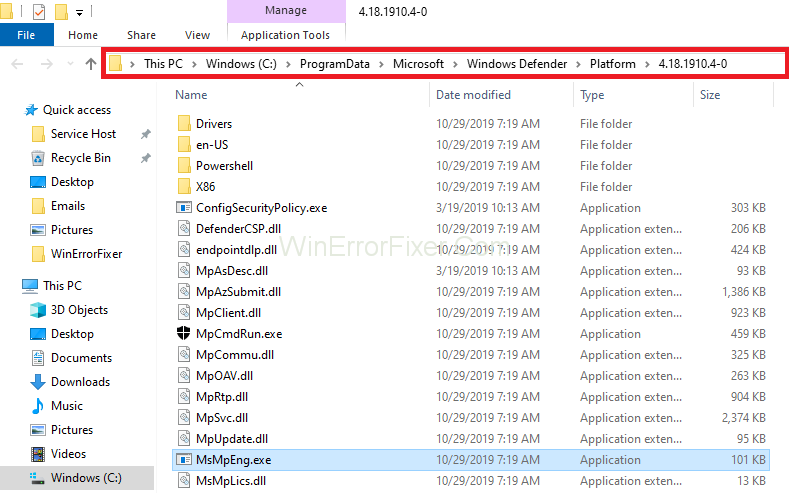
Step 2: Now, look for the process Antimalware Service Executable and then right-click on it. Now, you need to select Open File Location.
Step 3: Now, you will see the full path of the Antimalware Service Executable in the address bar and then click on the address bar and Copy the path.
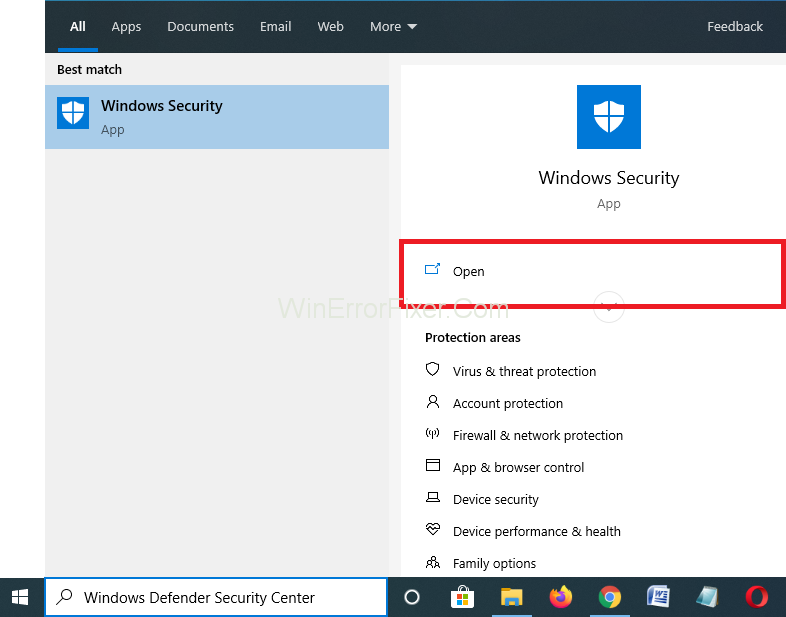
Step 4: The next step is to click on the Start Menu and then type “Windows Defender Security Center” and then click the result at the top to open Windows Defender Security Center.
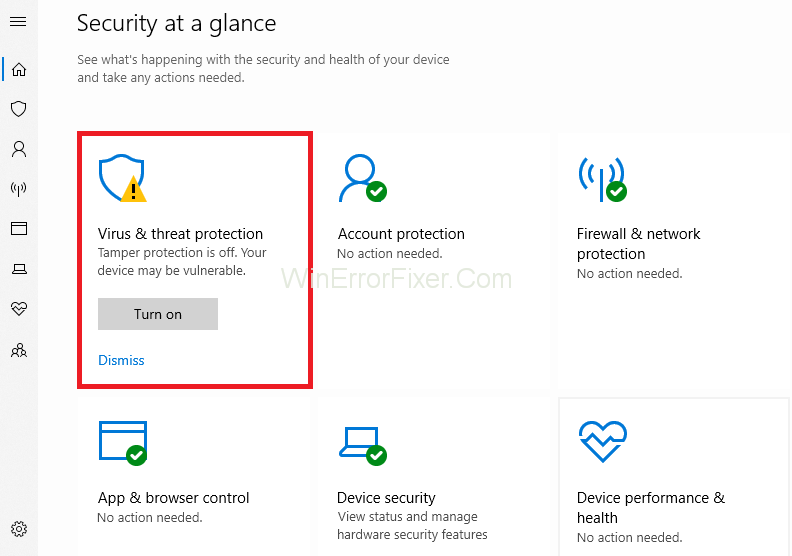
Step 5: Now, click on the Virus and threat protection.
Step 6: Then, click on the Virus & threat protection settings.

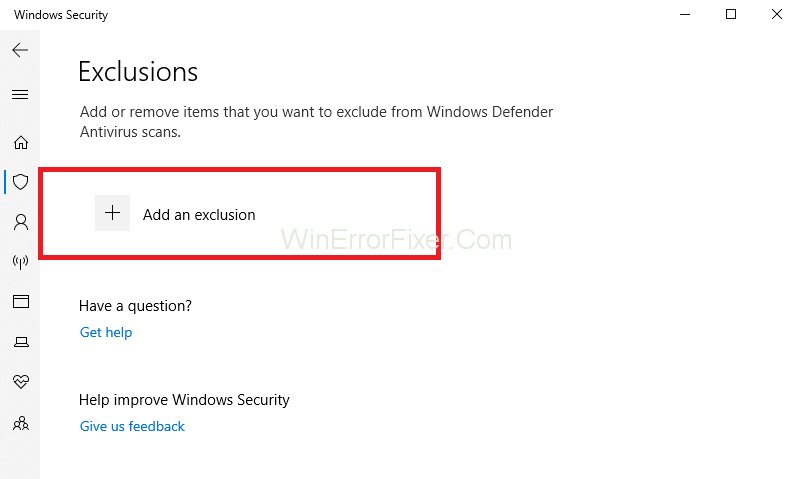
Step 6: Look for the option Exclusions and then click Add or Remove exclusions. A new screen will appear. Now, you need to click on Add an exclusion option.
Step 7: then select the folder and paste the path you have copied above in the address bar. At last, click on Open and the folder will not be scanned.
Similar Posts:
- Service Host Local System High Disk CPU and Memory Usage
- Avast Service High CPU Usage
- Ntoskrnl.exe High CPU, Disk Usage
- Windows Modules Installer Worker High CPU
- System Interrupts and Why It Is Running on High CPU Usage
Conclusion
The above methods will definitely work for you and will help in fixing the issue of high CPU usage by Antimalware Service Executable. Thus, increasing the efficiency of your system.


