You may find DNS Server Unavailable error when troubleshooting the browser. DNS or Domain Name System is the place where all the domain names for the websites that you have visited are stored.
When you search a domain name in your Web browser, your router forwards it to a DNS server. If that particular site’s domain name is saved, then it returns the respective IP address. In this way, the loading process for those sites becomes faster.
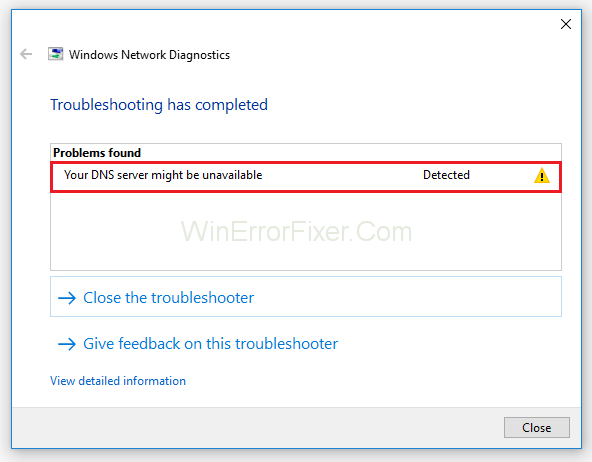
As high as this process might seem, it is not uncommon that the DNS server fails from time to time to establish the connection. In this case, if you attempt to Troubleshoot the Web browser, it can result in the “Your DNS server might be unavailable” error.
Numerous factors can cause the DNS server not responding error to pop up on your computer screen. The most prominent cause can be the possibility that the server is currently experiencing an outrage. But do not worry, as complex as it may sound, it is straightforward to tackle.
The Domain Name System (DNS) serves as the backbone of internet navigation. Instead of remembering IP addresses, we simply type in URLs, and the magic of DNS helps us reach our desired website.
But what happens when the magic falters, especially on an operating system like Windows 10? In this article, we delve deep into understanding DNS servers, their potential issues, and how to troubleshoot them.
What is a DNS Server?
A DNS Server, or Domain Name System Server, is a server that contains a database of public IP addresses and their associated hostnames. When a user types in a web address (like www.example.com), the DNS server converts that address into an IP address (like 192.0.2.1), guiding the user’s internet connection to the correct website.
What Causes the “DNS Server Unavailable” Error on Windows 10?
The “DNS Server Unavailable” error can be a vexing issue for Windows 10 users, stemming from various causes:
- Internet Connection Issues: A shaky or disconnected internet connection can lead to DNS server errors.
- Outdated Network Drivers: Older network drivers might not be compatible with the latest DNS configurations.
- Incorrect DNS Settings: If DNS settings are wrongly configured, they can lead to connection failures.
- ISP Server Issues: Sometimes, the problem might be on the ISP’s end if their DNS servers are down or facing issues.
- Corrupted DNS Cache: Storing outdated or corrupted DNS cache can interfere with DNS resolution.
How to Fix the DNS Server Unavailable Error
Don’t worry if you have received the error report that says “DNS server might be unavailable.” This can be easily fixed by things as simple as messing up with a few of the firewall settings, changing browsers, or rebooting the router. It is up to you to detect this root of the problem and use a suitable method to correct it.
You can start by trying to open that Web page in some other browsers. For instance, if you are facing this issue in Mozilla Firefox, then you can try opening this Web page in Google Chrome and Microsoft edger. If the Web page still doesn’t open, you can try testing out other devices.
Try to open this website on a mobile device, using the same network to make sure that the problem is not the consequence of hardware failures. Once done with all these steps, reboot the router. If you still see the DNS server unavailable error, then you will have to undergo some more effective methods.
Solution 1: Flushing Your DNS (Windows)
The most effective way to fix the DNS server is unavailable is to use Command Prompt to flush it. Steps for the same are:
Step 1: First of all, use the Windows + R key combination to open the Run dialogue.
Step 2: Type the following command in the field: cmd and then press the Enter key.
Step 3: Type: ipconfig /flushdns in the Command prompt window and then Press the Enter key.
Step 4: Then type ipconfig /release and press the Enter key again.
Step 5: At last, type ipconfig/renew and press the Enter key.
Solution 2: Flushing Your DNS (MacOS)
It is possible to flush the DNS on the Mac. The method of doing so will slightly vary according to the version of Mac your PC is running. It generally involves just a change in the syntax, which we used during the process.
Step 1: Open the Finder window.
Step 2: Open Applications and then open Utilities and finally Terminal.
Step 3: Enter the syntax given below depending upon the macOS version that you are currently using:
- MacOS High Sierra: sudo killall -HUP mDNSResponder; sleep 2; echo macOS DNS Cache Reset | say
- MacOS Sierra: sudo killall -HUP mDNSResponder;say DNS cache has been flushed
- MacOS Mojave: sudo killall -HUP mDNSResponder;sleep 2;
- MacOS X El Capitan/Yosemite: sudo dscacheutil -flushcache;sudo killall -HUP mDNSResponder;say cache flushed
Step 4: Now, press the Return key and enter the password.
Step 5: Then press the Return key again.
Step 6: Wait for the audio alert, which is indicative of a successful DNS flush, and then exit the Terminal.
If you are using macOS X, then cache clearing will require few added steps to flush it out fully. You have to flush both UDNS and MDNS caches on top of the steps taken previously.
Before you exit the Terminal, perform the commands given below:
- For the MDNS cache type: sudo discoveryutil mdnsflushcache
- For the UDNS cache type: sudo discoveryutil udnsflushcaches
Solution 2: Remove Multiple Antiviruses
In the world of technology, keeping multiple Antivirus programs installed on your PC can hinder the protection provided and cause unnecessary troubles.
Make sure you do not have two or more Antivirus programs running currently, as this could be the reason for the DNS problem. Once you have disabled all of the additional programs, restart your computer, and the problem should disappear.
Keep in mind that you only keep one Antivirus Software running in the future to defend yourself from fatal malware attacks. This will not only increase security but will also help you in avoiding other DNS server errors.
Solution 3: Changing DNS servers
If you have tried all the methods described above and you still see the DNS server unavailable error, then the best way to fix it is that you change your DNS servers.
You can choose from numerous public DNS, ex: Google’s free DNS is one of the most popular choices. The process to change your DNS is simple and will be done within a few clicks, depending upon where you wish to change it.
Solution 3: DNS Changes Via Router
Step 1: You can gain access to your router by opening your Web browser and then opening the Default Gateway address into the URL bar.
(You can access the Default Gateway by opening the Command prompt window and then typing ipconfig and then pressing the enter key. Now, copy the numbers present beside the Default Gateway in the pulled up info.)
Step 2: Using proper credentials, Log in to your router.
Step 3: Find your Internet account information, which will be found in a similar name tab.
Step 4: Go to the DNS server and then select the option that best mirrors your used Internet protocol (IPv6 or IPv4).
Step 5: Then, enter the DNS server address you wish to use instead of the current DNS server address.
Save the made changes and then exit the router interface.
Solution 3.1: DNS Changes via Windows OS
Step 1: Open the Network connection properties by using the Run function ( Windows + R key combination) and then type ncpa.cpl in the search bar.
Step 2: If you use Windows 10, then you can right-click on the Windows icon present in the bottom left of the computer screen and then click on Network Connections from the list.
Step 3: Click on the Network Adapter used currently. LAN for direct connection and WLAN for wifi connection, usually via Ethernet cable.
(Windows 10 will show the option on the left side panel. Click on one and then choose Change Adapter option present in the main Window)
Step 4: Right-click on your choice and then click on Properties.
Step 5: Highlight your IP version (IPv6 or IPv4) from the menu in the networking tab and then click on the Properties button.
Step 6: To enable editing option capability, click OK the radial for using the following DNS server addresses.
Step 7: Enter the DNS server address you wish to use.
Step 8: Finally, click on, OK.
Solution 4: Test the new DNS server
After the DNS server is changed, open the browser and try to visit any well-known site. If the website opens immediately, it means that the new DNS is functioning correctly. But if the site doesn’t open, then enter 172.217.16.195. This is one of Google’s IP addresses, directly into the browser, and press the enter key.
Wait for the Google logo and search bar to show on your screen. If this method doesn’t work, then the problem lies within the Internet and not with the DNS server itself. You should contact your Internet service provider for help in resolving this issue.
How to Reset My DNS Server on Windows 10?
Resetting or flushing the DNS cache can often resolve DNS related errors:
- Press Windows Key + R to open the Run dialog.
- Type in “cmd” and press Enter.
- In the command prompt, type
ipconfig /flushdnsand press Enter. - You should see a message saying, “Successfully flushed the DNS Resolver Cache.”
Checking Your DNS Server Problem:
To diagnose if the DNS server is the root of your problem:
- Open Command Prompt as an administrator.
- Type
nslookupfollowed by a website (e.g.,nslookup www.example.com). - If the server can’t find the address, it confirms a DNS server issue.
Manually Setting Your DNS Server:
- Right-click on the Start Menu and choose Network Connections.
- Click on Change adapter options.
- Right-click your network connection and select Properties.
- Select Internet Protocol Version 4 (TCP/IPv4) and click Properties.
- Choose Use the following DNS server addresses and input preferred and alternate DNS addresses (e.g., Google’s Public DNS: 8.8.8.8 and 8.8.4.4).
- Click OK and restart your connection.
Is It Safe to Reset DNS?
Yes, flushing or resetting the DNS cache is safe. It only clears the temporary data stored by your computer regarding DNS details. It does not affect your internet connection or any other system settings.
Forcing a DNS Update:
For users who manage a domain, forcing a DNS update (propagation) often involves:
- Updating DNS records at your domain registrar or DNS hosting service.
- Reducing Time to Live (TTL) values before making changes to speed up propagation.
- Using online tools like “DNS Checker” to monitor propagation status.
Read Next:
- YouTube Not Working
- The Audio Service is Not Running
- iTunes Not Opening
- No Audio Device is Installed
Conclusion
It is a very common error to occur. Don’t panic if it happens as it can be tackled quickly with some steps. Go through the guide carefully and make sure you are following the right method according to the operating system you are using. Hope this guide proves useful to you. A DNS server plays a crucial role in ensuring seamless internet navigation.
Recognizing common DNS errors and understanding how to resolve them can save users from unwarranted stress and keep their online experience smooth. Armed with the above knowledge, you’re well-equipped to troubleshoot DNS issues on Windows 10.


