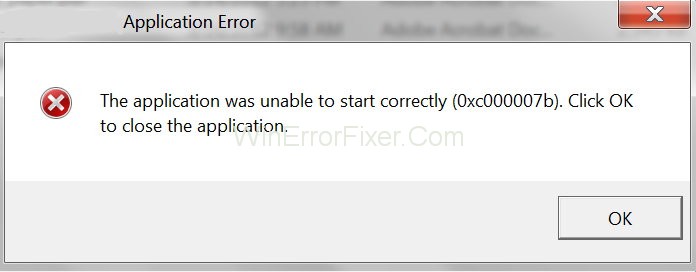
The error 0xc000007b is one among countless different errors that a Windows user may occasionally face. When this error occurs, the user cannot run an application. An error message appears which reads “The application was unable to start correctly. Press OK to close the application”.
Such a moment can be frustrating when there is no option other than to simply click OK as instructed by the error message. However, there are actually several options for the user in such a scenario in order to fix the 0xc000007b error and run the application. This article discusses some of those options.
How to Fix Windows Application Error 0xc000007b in Windows 10
There is no single cause for this application error. It usually occurs when there is an incompatibility between an application and the system when one of them is 32-bits and the other 64-bits. A 32-bit system has lesser memory capabilities than a 64-bit one. There may be other causes of this error too. Based on the possible causes, there are certain general techniques that the user can use to solve 0xc000007b error. The following are some of them.
Solution 1: Run The Program As Administrator
Often many programs may not run smoothly if the user does not have administrative privilege. Running the program as an administrator may thus fix the error. To do so, simply right-click on the application’s icon and select “Run as administrator”. If a confirmation pop-up appears, click Yes or OK.
In case the “Run as administrator” option is absent, follow the steps below:
Step 1: Right-click the icon and select Properties.
Step 2: In the Properties window, select the Compatibility tab.
Step 3: In the Compatibility tab, check the “Run this program as an administrator” option. Finally, click OK.
Solution 2: Update DirectX
A possible reason behind the error is that the latest version of DirectX is not installed. This is particularly the case regarding games. To update DirectX, visit the Microsoft website and install the latest version.
Solution 3: Reinstall Your Application
A simple but often effective technique to solve such problems is to reinstall the application, preferably its latest version. Follow the instructions below to do it successfully.
Step 1: Uninstall the program by going to Windows Settings and then its Apps section.
Step 2: Check your system version whether it is a 32-bit or 64-bit type. You can then install the app version of the same type. To check it, go to Control Panel and then the System section.
Step 3: It is better to disable your antivirus software before reinstalling the app. This is so that certain additional but useful software can be installed along with the app. Conduct a system scan before disabling the antivirus.
Step 4: Reinstall the app.
Solution 4: Update .NET Framework
If the program is using .NET technology, the Microsoft .NET Framework is crucial for it. A problem with your system’s .NET Framework will hamper the functioning of apps. This being a possible cause of the error 0xc000007b, updating your .NET Framework may fix the error. The following are the steps to do it.
Step 1: Go to Control Panel.
Step 2: Select Programs and Features.
Step 3: Now, click on the “Turn Windows features on or off” option.
Step 4: In the Windows Features window, select .NET Framework 3.5, and click OK
Wait for the installation to be complete, followed by a system restart. Then check if the error has been fixed.
The updates to .NET Framework can also be installed from Microsoft’s website.
Solution 5: Update DLL
Another possible cause of this error is that the DLL file (xinput1_3.dll) in your computer is corrupted. Updating this file can thus solve the error. The following are the steps to fix the DLL issue.
Step 1: Download a new version of 32-bit xinput1_3.dll online. Open the site dllme.com to obtain it.
Step 2: Extract the files through a compression tool like Winzip or Winrar.
Step 3: After extraction, copy the files to the location C:\Windows\SysWOW64. If you find any window asking to replace the existing file, click on “Copy and Replace”.
Step 4: Lastly, restart your system. Check if the error is rectified.
Note: In case the new file does not work, or things go against the plan, you must back up the original file so that you can reinstall it.
Solution 6: Reinstall the Affected Application
Often, the reason for this error may be that the application was not installed properly. It may have suffered a fault during the installation process. Thus, reinstalling the app successfully may solve the error. Following is the procedure.
Step 1: Uninstall the app by going to Control Panel → Programs → Programs and Features, and clicking on “Uninstall a program”.
Step 2: Follow the displayed instructions to complete the uninstall process. Then restart your system.
Step 3: Reinstall the application from its website.
Solution 7: Uninstall and then Reinstall the Microsoft Visual C++ Redistributable
The error may be caused due to a problem with the Microsoft Visual C++ Redistributable package. It is a crucial aspect of many applications. To reinstall it, follow the steps below.
Step 1: Go to Control Panel → Programs → Programs and Features and select “Uninstall a program”.
Step 2: Find the Microsoft Visual C++ Redistributable in the list of applications. Right-click on it and select Uninstall
Step 3: Follow the displayed instructions to complete the uninstall process. Then restart your system.
Step 4: Reinstall the Microsoft Visual C++ Redistributable from online. Go to the link https://www.microsoft.com/en-gb/download/details.aspx?id=5555 for the version x86 (if your system is 32-bit). Go to the link https://www.microsoft.com/en-us/download/details.aspx?id=14632 for the version x64 (if your system is 64-bit).
Step 5: Restart the computer and check whether the problem still exists or not.
Solution 8: Run CHKDSK to Scan Your Computer’s Hard Drive
The problem may also be due to hardware complications. Keeping this in mind, a hard drive scan may help identify and rectify the problem. Following is the procedure for a hard drive scan.
Step 1: Open Command Prompt as administrator. Search “cmd” in Windows search bar, then click “Run as administrator”
Step 2: Press Enter after writing the following command:
chkdsk c: /f /r
If the system file is in any other drive, mention that drive instead of.
Step 3: The scan may not be possible immediately if the system file is in C, the primary drive, as it is in use. You will be asked if you want to schedule the scan for the next system reboot. Type y to answer yes, and press Enter.
Step 4: Restart the system. The scan will then start automatically. Once complete, check whether the error has been rectified.
Read Next:
- Application Error 0xc0000142
- Error Code: 0x80070035 – The Network Path Was Not Found
- 0xc1900101 Driver Error
- 0x8024001e Error on Windows Store
Conclusion
Thus, various techniques to fix the error 0xc000007b have been discussed. Any of these solutions must ideally work, depending on the exact cause of the problem. If in the rarest circumstance none of them work, then refreshing or reinstalling Windows OS is the last resort. It may not be necessary if any of the simple methods described here work.


