Are you too getting an error message like “VAC was unable to verify the game session” while playing Counter-Strike: Global Offensive, which is amongst one of the most popular games ruling over many hearts. Then, You Are Not Alone as many CS: GO players are encountering the same error while they queue for a matchmaking session.
So, if you are looking out for a solution to fix this, then you are at the absolutely right place because, in this article, we will talk about the fixes of error “VAC was unable to verify your game session” which pops out while playing CS: GO and such games.
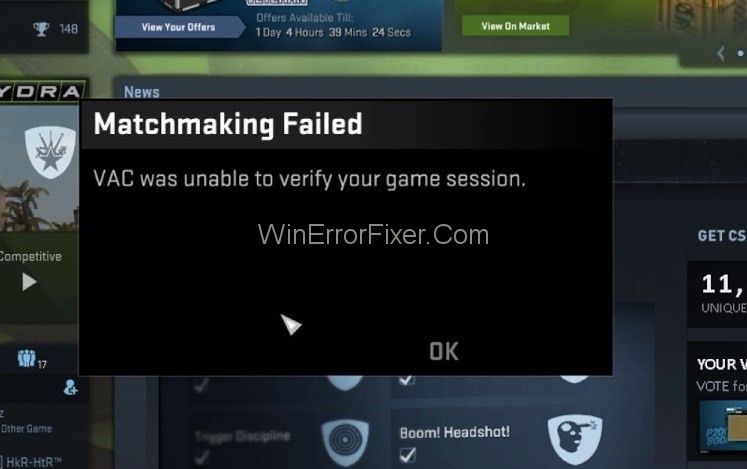
To start with, you should know that VAC stands for the Valve Anti-Cheat system. Basically, VAC was designed with an agenda to detect installation files anomalies where files might be manipulated to provide unfair means for players to gain an edge over other people. So, If you are getting VAC Was Unable To Verify The Game Session error even if you did not do anything wrong, then it might be due to the configuration of files.
As a matter of fact, sometimes, it also happens that VAC generates a false positive error and results in “VAC was unable to verify the game session” error message even if the users did not modify the game or configured the files. But, whatever may be the cause, we should now focus on the ways to get rid of this VAC error message and to continue playing the game without any hindrance.
How to Fix VAC Was Unable To Verify The Game Session in Counter Strike: Global Offensive
We have five ways by which you can get rid of VAC Was Unable To Verify The Game Session Error message by following some simple steps. So, let’s get started.
Solution 1: Log Out of Steam and Log in Again
It may happen that it was not you who was responsible for modifying the game, but your operating system can be. So, If in case your operating system or file management system was responsible for altering your configuration files then, it will make your VAC unable to verify them and thus, in turn, will lead to this VAC error. But you can get rid of this with a very simple way that is by logging out of your steam account and then Re-logging in it again.
It will remove all the altered configuration files upon logout and recreate those files when you log in again. Now, if in case you are thinking that Reinstalling the game can help you then, hold on because that will reinstall all those configured files again, and your problem won’t solve.
Instead, you can reinstall your steam application, which will give you the desired results. We recommend you to log out of your steam account and then log in again as it is more effective than the former and will give better results. You can achieve this by the following steps:
Step 1: Firstly, click on the Steam icon in the taskbar, the Desktop or the Start Menu, and after that, run the steam application.
Step 2: After opening it, click on your Profile name on the title bar (topmost bar of the window).
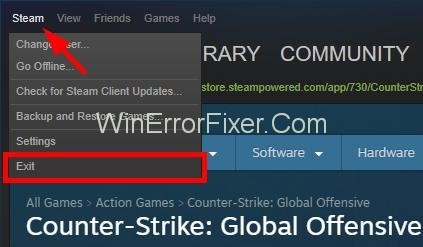
Step 3: Then, in the drop-down menu, click on log out my account and follow the instructions of the dialogue box.
Step 4: Now, log in again with your credentials and click on forgot, if you don’t remember them to reset your password.
This method will most probably solve VAC Was Unable To Verify The Game Session issue if it was caused by your operating system or file management program.
Solution 2: Just Reboot Your Computer
Sometimes, applications like anti-virus or processes like disk indexing service get access to some of the files. After which there access by operating system gets denied (to avoid read-write conflicts) and thus, leads to “VAC WAS UNABLE TO VERIFY THE GAME SESSION” error message. But you can get rid of this error by simply rebooting your system. To reboot your computer, follow these steps:
Step 1: First of all, click on the Windows button present at the leftmost bottom corner of your screen. (You can also opt for pressing Windows button on your keyboard).
Step 2: Then, in the Start menu that appears, click on the power button and select Restart.
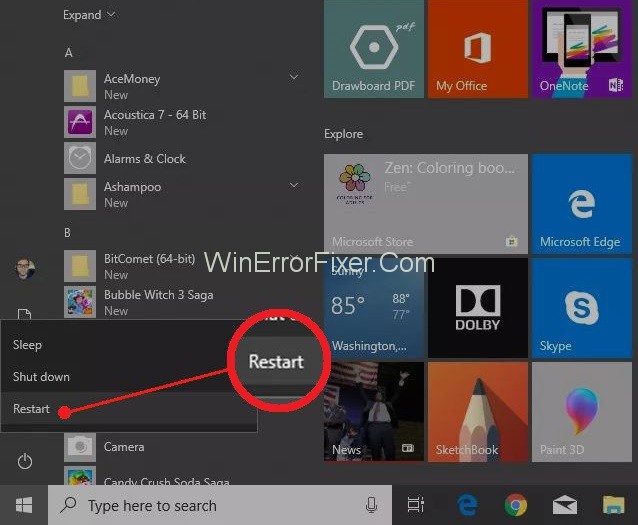


Note: Before rebooting, close all background applications if in case your OS asks it.
After the rebooting process finishes, you can open your game again and check whether the error is gone or not. If it persists, then you can opt for the following method.
Solution 3: Verify the Integrity of the Game Files
You can also opt for checking the integrity of the game files to know about any of the corrupted components in the files by verifying it to see whether the files are the same as described by the game makers and steam distributors or not. To verify the integrity of the game files, you need to follow the steps given below.
Step 1: First of all, open Steam by using the start menu icon.
Step 2: Then, go to the Library tab. There you will see installed games on your device.


Step 3: Then, right-click on the game you are facing the “VAC was unable to verify the game session” error in, and after that, go to properties.


Step 4: At last, in the local tab, click on the Verify integrity of the game files option.
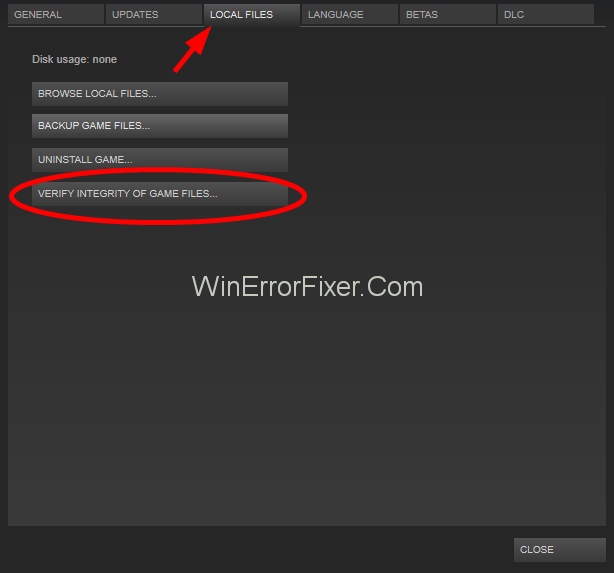


Step 5: Now, wait for some time to complete the process.
After the process completes, check whether the error is gone or not. Also, remember that before performing this method, close all the background applications which are not related to your steam program.
Solution 4: Repair the Steam
It is also possible that the VAC was unable to verify Your Game Session is caused by some broken files of the steam itself. But no worries, as we have a solution for this too. The below steps will guide you to tackle the same.
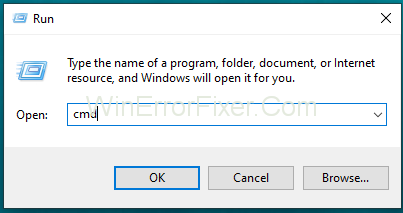
Step 1: Press Windows + R keys together to open run command box.
Step 2: Then, type cmd in there and open the command prompt.


Step 3: Then, in the command prompt, copy and paste and then, press enter.
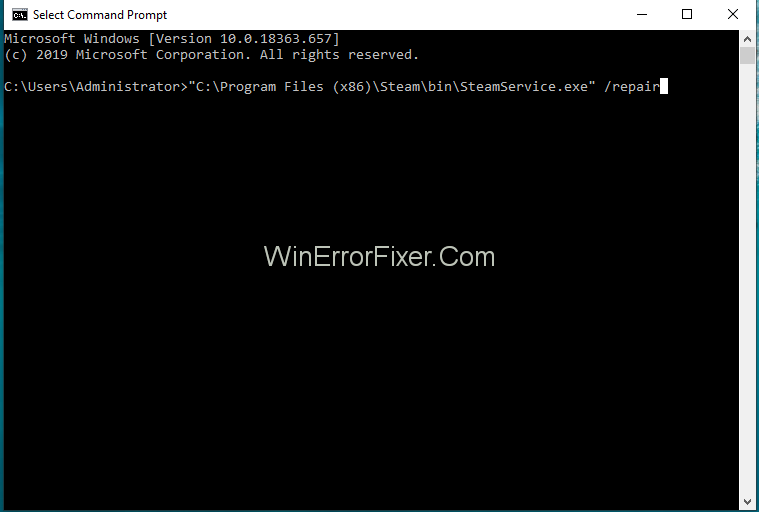


"C:\Program Files (x86)\Steam\bin\SteamService.exe" /repair
Step 4: If the path to the SteamService.exe is different in your system, replace the path with the path of your SteamService.exe.
Step 5: Now, wait until the process completes and then restart your computer.
Step 6: After that, try to open the steam app first, it may reconfigure itself or download some files for update or configuration. Then log in if prompted so.
Now you can reopen your game application and see if the issue is resolved or not.
Solution 5: Exclude Game Directory from Antivirus Scan
Your antivirus program can also trigger the VAC Was Unable To Verify The Game Session error. Usually, it happens that the antivirus automatically scans the game files in the background without acknowledging us. Then, it prevents VAC from verifying those files, which leads to “VAC Was Unable To Verify The Game Session” error message.
Now, to prevent all this, you need to whitelist the game and steam directory from being automatically scanned. It will help you to get rid of this error message. (Every antivirus program have their way of excluding files from the automatic scan). Hence, you can create a new folder of whitelisted items and get free from this error using this method.
Don’t Miss:-
- Dragon Age Inquisition Won’t Launch in Windows 10
- Disable Superfetch in Windows 10, 8 & 7
- Gmail Server Error 007
- Steam Disk Write Error
Conclusion
“VAC was unable to verify your game session” is an annoying error message which enables you to play CS: GO and some other games of that kind. This might make you frustrated and, thus, needs to be fixed asap. Hopefully, this article helped you to achieve the same so that you can enjoy your wonderful gaming session.


