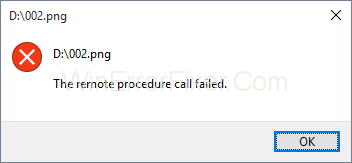
You open a thousand applications and webpages every day, but if you get an error which stops you from doing so. If you have ever faced and error known as Remote Procedure Call Failed, we are here to provide you with the remedy to deal with it.
Before starting up let’s understand the Remote Procedure Call. It helps the system to have a distributed client-server program.
This error occurs generally in Windows 7,8 and even 10. The areas where people generally encounter this problem is while using photos, documents, Windows media player, and several other applications.
In the realm of computing, especially within the context of network systems and distributed applications, the term ‘Remote Procedure Call’ (RPC) frequently pops up.
If you’re trying to grasp what RPC is or how to deal with common issues like the “Remote Procedure Call Failed” error on Windows 10, you’re in the right place.
What is Remote Procedure Call (RPC)?
Remote Procedure Call, commonly abbreviated as RPC, is a powerful protocol used in computer networks that allows a program to cause (request) procedures or services to execute in another address space (commonly on another computer on a shared network).
In simpler terms, RPC lets a program on one computer send a request to a program on another computer over a network.
Key points about RPC include:
- Distribution: It facilitates the execution of processes in a distributed system setup.
- Transparency: RPCs are designed in such a way that the communication between the client and server is transparent, meaning the system handles the underlying complexities.
- Language-Neutral: Many RPC systems, such as Google’s gRPC, allow communication between applications written in different programming languages.
Causes of the “Remote Procedure Call Failed” Error on Windows 10:
This error typically pops up when there’s an issue with the RPC service or related dependencies. Some potential causes include:
- RPC Service Not Running: The most common cause is that the RPC service itself isn’t running. It’s crucial for certain operations, and if it’s stopped for some reason, you might encounter this error.
- Corrupted System Files: Damaged or missing Windows system files can disrupt many services, including RPC.
- Firewall Restrictions: Sometimes, strict firewall settings or third-party security software can block the necessary ports or services, leading to this error.
- Network Issues: Given RPC’s nature, any disruption in network connectivity can lead to RPC-related errors.
How to Fix Remote Procedure Call Failed Error in Windows 10
The reasons for this problem can be due to problems with the applications or operating system, virus infection, some corrupted files, or any such reason. We shall be discussing the solutions to this problem.
Method 1: Running Troubleshooter
Windows already comes with the troubleshoot feature for various applications and hardware. Here we shall see how to run the trouble-shooter and fix the problem.
Step 1: Press Windows + R. Type in the control panel and enter.
Step 2: Sort the icons by category. Select system and security.
Step 3: Click on troubleshoot common computer problems. Choose troubleshoot and simply go to the Windows store.
Step 4: Run the trouble-shooter. Finish up the troubleshooting steps. Restart your system and run the Windows store.
Method 2: Changing default programs
If you fail to load apps like the Photo app or any other applications due to RPC failure, you need to check which app you are using for this purpose.
Photos have a particular extension and can only be accessed by particular applications; in case you try to open it with any application that doesn’t support it may lead to error. One thing that can be corrected is the setting of default applications.
Step 1: Press Windows + R. Type in the control panel and hit enter.
Step 2: Sort the icons in the category view. Select Programs and choose default programs. Click on default programs to select the default applications.
Step 3: Choose photos and set it as default. Click OK. Try opening your photos.
Method 3: Windows Photo Viewer
Windows Photo viewer app is a very powerful tool that is popularly used by a lot of users but this application is missing in Windows 10. People who have previous versions of Windows are able to use it.
We shall see how to get back the Windows photo viewer back in Windows 10. To activate Windows photo viewer, we need to make changes into the registry, before making any changes you need to take a back up of the registry database.
Step 1: Select an image and note down its file path. Open up notepad.
Step 2: In the notepad file paste the file path.
Step 3: in the new line in notepad paste the following command %SystemRoot%\System32\rundll32.exe “%ProgramFiles%\Windows Photo Viewer\PhotoViewer.dll”, ImageView_Fullscreen
Step 4: In your notepad file you shall have 2 lines. the file and the code.
Step 5: Copy the path and again paste it after the code again.
Step 6:Copy the entire code. Press Windows+ R and paste the entire code and hit enter.
Step 7: The image shall automatically open in the photo viewer.
Step 8: Close it and try opening the file directly, it shall open directly in the photo viewer as the default program.
Method 4: Start services
There are a lot of services that keep on running in the background for the smooth working of various applications. For making any changes in the configuration of services, you need to have administrator privileges.
There are 3 services, RPC, RPC Location, and DCOM. You can simply double click on them by double-clicking on them.
Here we shall learn about how to configure these services in Windows 10.
Step 1: Press Windows key + R.
Step 2: Type in services.msc. Hit enter and you shall see the list of services.
Step 3: Go to Remote Procedure Call and check that it is running.
Step 4: In case if its not running right click on it and choose automatic under the start-up type. Click apply and select OK.
Step 5: Look for Remote Procedure call locator. Right-click and select properties. In the start-up type and choose manual. Apply this and select OK.
Step 6: After this, you need to search for DCOM Server Process launcher and similarly check if it’s running.
Step 7: In case if it’s not running right-click on it chose properties. In the start-up type again choose automatically. Apply this and select ok.
Step 8: Restart your system
Method 6: Scan your computer for malware
It’s a high probability that your system is suffering from a malware which is causing overall trouble for your system. A simple way to search for any viruses in your system, you can try out the free version of Avira antivirus.
Another way to perform the scan is by using the Windows defender which comes built-in. Whenever you install an antivirus, you shall see the icon right in the taskbar. Either you can access it by searching for it or you can simply access it through the taskbar.
Step 1: Simply open the start menu and type in your antivirus name.
Step 2: Right-click on your antivirus and run as administrator.
Step 3: Scan your system. Confirm if it asks you to run as administrator
Step 4: Have a complete scan and restart your system.
In case you want to use Windows Defender. These are the steps for the same.
Step 1: Go to your taskbar
Step 2: Right click on the Windows defer and open it.
Step 3: Complete the full scan of your system
Step 4: Whenever the scan is over restart your system.
Method 6: SFC/ SCANNOW
This is a feature provided by Windows that checks if any of your files are corrupted. Removing the corrupted files can help your system to deliver a smooth performance. With this feature, you can remove all the corrupted files lying in your system.
In order to use the SFC utility, you can use it from the console menu and simply type the command as SCANNOW. This will scan all your files and will automatically repair them.
Method 7: Change DPI Scaling
Another way wherein the RPC Failed issue can be fixed is by Display heading in Windows 7.
Here is a way to change the DPI scaling in Windows 7.
Step 1: Press Windows + R.
Step 2: Open the control panel by searching.
Step 3: Sort items by category.
Step 4: Select the appearance and personalization.
Step 5: There you will be able to find an option Make a test and other items larger or smaller.
Step 6: Try changing the size of the text from small to large. Apply them one by one.
Step 7: Sign-out of your system. Whenever your login try out your applications.
Method 8: Deletion of content from Local State folder
In the following method, we shall be removing content from the folder knows as LocalStore. Follow the procedure to remove this content.
Step 1: Press Windows+ E. You shall see file explorer open up.
Step 2: Type the following path to navigate to the desired folder.
C:\Users\Your Account \AppData\Local\Packages\Microsoft.Windows.Photos_8wekyb3d8bbwe\LocalState
Step 3: Select all the files and delete them. Confirm the deletion of files.
Step 4: Restart your system. Try opening your applications.
Method 9: Uninstall registry cleaner
It is a possibility that the registry cleaner is causing trouble for your system. Here is the way to uninstall your registry cleaner.
Step 1: Press Windows + R.
Step 2: Type in appwiz.cpl and hit Enter. You’ll see the program and features window.
Step 3: See if you have any registry cleaner installed, generally people have wise registry cleaner. Simply right-click on it and uninstall.
Step 4: After the uninstallation, restart your system.
Method 10: Uninstall video codecs
There might be a possibility that you are having video codecs in your system. You need to uninstall any such software which provides video codecs. Here is the procedure for the same.
Step 1: Press Windows + R
Step 2: In the run window type in appwiz.cpl and hit enter.
Step 3: In the programs and features look for Windows 10 codec pack 2.0.8
Step 4: Right-click on this and uninstall.
Step 5: Restart your system and check your apps.
Method 11: Uninstall PDF Architect
Now just like the other two software, this is another software that can trouble up your apps. We will tell the procedure to delete this application.
Step 1: Press Windows+ R
Step 2: In the run Windows type appwiz.cpl and hit enter.
Step 3: In the program and features look for PDF Architect 5.
Step 4: Right click and uninstall.
Step 5: Restart your system.
Method 12: Reinstalling default applications
In Windows, you can reinstall your Windows default applications using the PowerShell applications.
Step 1: In the start menu look for PowerShell.
Step 2: Run this application with administrator privileges.
Step 3: Click Yes to confirm running of application.
Step 4: In the window type Get-AppxPackage photos | Remove-AppxPackage to uninstall Photos app. Again type Get-AppxPackage -AllUsers| Foreach {Add-AppxPackage -DisableDevelopmentMode -Register “$($_.InstallLocation)\AppXManifest.xml”} and press Enter to install Photos app again.
Step 5: Restart your system and your application should run fine.
Method 13: System Restore
People neglect the capabilities of the backup and restore feature and often do not create backups for their system. It’s a must for users to have a system backup when everything is running fine to avoid any sort of troubles.
Windows lets you restore your system to the desired position and ensure smooth working. Backup lets you create a system memory which you can restore at the time of need or when your apps fail to function properly. Here we shall be providing up the steps to create a Windows backup.
Step 1: Press Windows+ R
Step 2: Type in rstrui.exe in the run box
Step 3: You shall see a box showing up various restore points created by your system.
Step 4: Identify the checkpoint wherein your applications are functioning well and restore it. Click Finish
Step 5: Restart your system and your system shall be restored at the previous point.
Method 14: Move your data into another account
In the following method we shall be giving you steps to create another account with administrator privileges.
Step 1: Press Windows + R
Step 2: In the run command window type in netplwiz and hit enter.
Step 3: In the user account click on Add to add another user account.
Step 4: Select the option which says Sign in without a Microsoft account as in this method you shouldn’t use Microsoft account.
Step 5: Choose a local account, type in a username, password, hint, and hit next.
Step 6: You will have a new account created hit finish.
Step 7: In the new account and click properties.
Step 8: Choose the group membership tab. change your account from standard user to administrator.
Step 9: Click apply and hit OK.
Step 10: Press Windows + X
Step 11: Click the shutdown button and sign-out of the system.
Step 12: Log in to your new account.
Step 13: Open up file explorer, and select This PC on the left side.
Step 14: Go to the location C:\Users. You shall see all the accounts in your system, select the corrupted account.
Step 15: Select and copy the folders which are Desktop, Document, Downloads, Music, Pictures, and Videos from the corrupted folder and paste it in your newly created account.
Step 16: Press Windows + R
Step 17: Type in netplwiz and hit enter.
Step 18: Select your corrupted user account.
Step 19: Remove this account and confirm the deleting of the user profile.
Step 20: Try testing your apps, in case all your applications are working well, you can proceed on with the deletion of your corrupted account.
Step 21: Open the file explorer and navigate to C:\Users and proceed deletion of your corrupted account.
Step 22: Restart your system and see the effect.
Method 15: Reinstall your operating system
If even after all the methods mentioned above if your system still isn’t able to work properly, you can try reinstalling your complete operating system. In Windows 10 you shall get a feature to reset your system which shall uninstall everything in your system and reinstall Windows without damaging your files.
Here we shall provide you with steps to reset your pc. In case you are using the previous version of Windows you shall need a DVD or USB flash drive for the installation, along with this you need to take a backup of your data.
Step 1: Press Windows + I to launch Settings.
Step 2: Select update and security followed by recovery.
Step 3: You shall see an option under reset this pc click get started.
Step 4: Select the option accordingly. You shall see 2 options
Option 1: Keep my files: Remove apps and settings, but keeps your personal files.
Option 2: Remove everything: Removes all of your personal files, apps, and settings.
Step 5: Click reset, wait for the process to end. Install your desired applications and configure your system from scratch.
How Do I Run a Remote Procedure Call?
The process of initiating an RPC involves both a client and a server setup. The exact method depends on the system and platform you’re using. For the context of Windows and its built-in RPC services:
- Ensure the RPC Services are Running:
- Open the ‘Run’ dialog box by pressing
Windows + R. - Type
services.mscand press Enter. - Look for the “Remote Procedure Call (RPC)” and “RPC Endpoint Mapper” services. Ensure they are running. If not, right-click and choose ‘Start’.
- Open the ‘Run’ dialog box by pressing
- Using RPC with Specific Applications:
- If you’re using a specific application that leverages RPC (for example, certain distributed software or network tools), refer to its documentation. Typically, the process involves setting up the server to listen for RPC requests and then using the client-side of the application to initiate the RPC.
Conclusion
We hope this helps you to fix Remote Procedure Call Failed problem, we have provided you with all the possible solutions. In case you face any problem with any of the solutions feel free to contact us.
Remote Procedure Call is a pivotal concept in distributed computing, bridging the gap between disparate systems and allowing for seamless communication in networked environments.
While the underlying mechanisms might seem complex, understanding the basics can be immensely beneficial, especially when troubleshooting common issues on platforms like Windows 10. Always ensure that essential services, like RPC, are active and functional to maintain optimal system performance.


