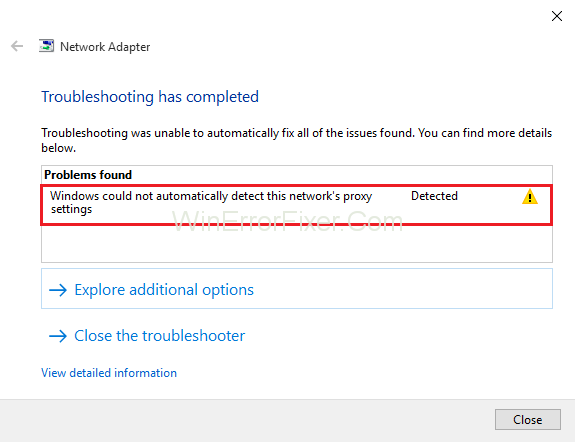
Most of you might have noticed a small yellow-colored caution triangle or a yellow triangle with an exclamation mark appearing on your WiFi name in the taskbar of your monitor. To troubleshoot when you right-click on it to solve the issue, then apparently you see an error with a message on the monitor that says: Windows could not detect this network’s proxy settings.
Although this error isn’t related to any specific build and might appear at times without any prior warning or cautionary message, in most cases, the villain behind this error is corrupt system files, or it can also happen if there is a change in proxy settings of your Windows.
This error simply prohibits you from using your internet, and no matter what is the cause behind this error, it can always be sorted out. As I have already mentioned, corrupt system files might cause this error, corrupted system that sometimes also leads to changes in the network or proxy settings of the Operating system, which automatically leads to “Windows couldn’t detect this network’s proxy settings”.
Well if you ever see this error or warning signs on your network, I would advise you to go through the general troubleshooting as the first method to solve this issue, if this doesn’t work, then you can go for the other ways to solve Windows Could Not Detect this Network’s Proxy Settings error which is mentioned in this article in detail.
How to Fix Windows Could Not Automatically Detect Network Proxy Settings Error in Windows 10
A proxy server acts as an intermediate server between your computer and several other servers, and any error in the proxy server ultimately prevents the user from using the internet. Also, any error related to a proxy server can lead to several other errors, which you can easily solve by following a few steps.
In this article we are going to cover the following problems and will also provide you methods to solve the errors:
Windows 10 can’t detect proxy settings: This is one of the common errors which can be easily solved by using one of the solution/methods we are going to explain in this article.
Windows could not automatically detect proxy servers: If you get this message, then the problem is simply related to your network configuration. You can try to changing your VPN to fix this.
Windows won’t save proxy settings: This is also a common error, and you can quickly solve it by following solutions provided in this article.
Windows proxy settings keep changing: This is also one of the common errors. Sometimes the users notice, their network proxy settings keep changing, and they are unable to configure their network’s proxy settings.
Windows 10 proxy settings not saving, changing: This might be the most annoying proxy error that you face. At times, this might happen that the changes or even the default settings of your network’s proxy settings are unable to save, or they keep changing.
After going through the above problems, you can see that this error can cause several inconveniences, but luckily in this article, we are going to explain methods that you can use to fix this problem.
Solution 1: Run Network Troubleshooter
To do this follow the steps given below:
Step 1: Right-click on the Start button and then choose Settings from the menu.
Step 2: Then, in the main interface Select Update & Security section.
Step 3: Select Troubleshoot from the left pane and then go for the Network Adapter icon then click on the Run as Troubleshooter button.
Step 4: Next, the troubleshooter will open up. You will have to follow the instructions displayed on the screen to complete the process.
Tip: Some users have also found that running Internet Connections Troubleshooter also helps to fix this issue. So, if you feel like you can give it a try.
Solution 2: Using Winsock Reset Commands
This is the first method you should try to fix this error; this method allows you to reset the Winsock settings back to default, or you can say back to the clean slate. This will help you to get rid of any changes that were causing this error; you can follow the steps given below:
Step 1: Click on the Windows button and then type cmd in the search bar.
Step 2: From the options that appear on the screen right-click on the command prompt option.
Step 3: A pop-up menu will appear, then select Run as Administrator option.
Step 4: Then type-in the command mentioned below and hit the “Enter” button
netsh Winsock reset catalog
Step 5: Then, you need to restart your computer and check if the error is solved or persists. If the error is not solved, then continue the following steps.
Step 6: Type in the command given below:
netsh int ipv4 reset reset.log
Step 7: Then type in the following command:
netsh int ipv6 reset reset.log
Step 8: After that type “exit” and then hit the Enter button.
Once you are done, do check if the problem/ error is solved or not. In case the problem isn’t solved, restart your computer/laptop and then check again.
Solution 3: Uncheck Proxy Server Option
This will also help you to solve your problem, and this method includes unchecking the network/ proxy settings given in the operating system of your computer. This method is more switching off the default settings of your network, which will allow Windows to automatically detect proxy settings.
Follow the steps given below:
Step 1: Long press the Windows key and then press R.
Step 2: In the run box type inetcpl.cpl and then press the Enter button.
Step 3: Then click on Connections Tab and then click the LAN settings button.
Step 4: You will be redirected to a new page where you will see an option saying Use proxy servers for your LAN under the proxy server section. Uncheck this option.
Step 5: A message will appear on your screen asking your permission to automatically detect proxy settings, click OK, and then click on the OK button again.
Now do a quick check if your internet connection is working properly or not, it should work fine by now, and if not, then you can try the other methods provided in this article.
Solution 4: Scan for Virus
Sometimes the real culprit that causes this error can be a corrupted file on your system/ malware or a Virus. Any of these can cause a change in the proxy settings of your network and prevents your computer from using the internet and can redirect the traffic to their preferred settings.
Now, this seems like a little difficult case, but that doesn’t mean it can not be solved. This might take place if your system lacks an Antivirus. You can fix this problem by following the steps given below:
Step 1: First of all, you will need to do a quick scan of your system thoroughly with the help of an Antivirus. If you have not installed any Antivirus in your system, then we suggest you get one.
Step 2: See if there is any Virus on your system after the scan is done.
Step 3: If there is a Virus or Malware on the system, then quickly remove it from your system.
Step 4: After the Virus is deleted from your system, do a quick check if the Windows Could Not Detect this Network’s Proxy Settings error is solved or not.
Solution 5: SFC Scan
If the above method doesn’t work and the problem is still there due to some corrupted files or malware, you can perform the SFC scan. SFC Scan is another good method that will help you to fix the problem by replacing the corrupted files on your system with the correct ones which are already stored in your computer’s operating system.
You can perform the SFC scan using the following steps:
Step 1: Press the Windows key & in the search box type cmd.
Step 2: From the options that appear on the screen, right-click on the command prompt. Then click on Run as Administrator option.
Step 3: Next type in SFC /Scannow and hit the enter button.
Step 4: The process will take some time to finish, then you can see the results once it’s done.
After the scan is completed, do check if the internet is working, and the Windows Could Not Detect this Network’s Proxy Settings problem is solved or not.
Solution 6: Check your Proxy Server Settings
You can perform this method by following the steps provided below:
Step 1: First of all, you will need to disable the proxy server on Internet Explorer.
Step 2: Press the Windows key + R simultaneously.
Step 3: A Run dialogue box will appear, type in inetcpl.cpl and hit the enter button.
Step 4: Next, a box of internet settings will appear, from which click on the Connections tab and then click on the LAN Settings button.
Step 5: Then, in the LAN settings box, check if the proxy settings of your network are okay.
Solution 7: Reset TCP/IP
You can fix this error by resetting TCP/IP using Windows PowerShell. Follow the steps given below to perform this method:
Step 1: Press theWindows key + X key simultaneously, and then from the pop-up menu that appears on the screen, click on the Command Prompt (Admin) option.
Step 2: Then type netsh int ip reset resetlog.txt. After the command prompt starts.
Step 3: After that, restart your computer and check if the issue is solved.
In case the problem persists, you can follow another method (s) provided in this article.
Solution 8: Reset your Internet Settings
You can try this method to fix Windows could not automatically detect this network’s proxy settings error. This, the step will change your internet settings to default, to do this method follow the steps given below:
Step 1: Long press Windows key + S key simultaneously and select internet options icon.
Step 2: In the internet properties, choose the Advanced tab and then click on the reset button.
Step 3: A message will pop-up on the computer screen, asking for your permission if you want to delete your internet settings. You can choose to delete it by checking Delete personal settings or not.
Step 4: If you want, then you can click on Restore Advanced Settings > click on Apply > OK, this will save the changes.
Solution 9: Restart your Network Adapter
Restarting your Network Adapter is the simplest method that you can use to fix this error, to do so follow the steps given below:
Step 1: First of all, right-click on the network icon situated on the right corner of the toolbar.
Step 2: Then choose Open Network and Sharing Center option.
Step 3: After that, from the menu shown on the left side, click on the Change Adapter Settings. You will be redirected to a new window.
Step 4: Search for your Network Connection, and then right-click on it, then choose Disable option.
Step 5: Next, right-click on your network connection again and then choose the Enable option.
This will restart your Network Adapter and hopefully will fix the issue. After you are done with the steps described above, check if the Windows Could Not Detect this Network’s Proxy Settings issue is solved or not.
Solution 10: Enable Obtain DNS Server Address Automatically
Though most of the users prefer to set their DNS settings manually. Another method that you can use to fix this error is enabling DNS Server Address Automatically. Following steps will help you with this method:
Step 1: Right-click on the Network Connection and then go to Network and Sharing Center.
Step 2: Then go to Change Adapter Settings and then Search for your Network Connection. Once you find it right-click on it and then choose Properties from the menu that appears on the screen.
Step 3: In the Ethernet Properties section, select Internet Protocol Version 4 (TCP/IPv4) and then click on the Properties button.
Step 4: Next, choose Obtain DNS Server Address Automatically option and then click on OK to save the changes.
After doing that, check if your internet connection is working or not.
Solution 11: Change Proxy Settings
You can also just go for a simpler method, i.e., Changing Proxy Settings to fix this issue. Follow the below steps to do so:
Step 1: Long press Windows key + I key both at the same time and go to the Settings App.
Step 2: In the Setting App, go to Network and Internet Section, and a new window will open.
Step 3: Then, click on the Proxy situated on the left side of the screen > disable Automatically Detect Settings in the right pane.
Later you can check if your internet is working properly, and the Windows Could Not Detect this Network’s Proxy Settings issue is fixed.
Solution 12: Uninstall your Antivirus Software
One of the reasons behind this error can be the Antivirus Software that sometimes can lead to proxy issues. You must be wondering that uninstalling your Antivirus Software wouldn’t it make your computer more susceptible to the virus.
Well, there is nothing to worry about because Windows 10 is packed with a Windows Defender system that will protect your system when you uninstall the Antivirus Software.
You can uninstall Antivirus Software from Windows using the following methods:
Windows XP: Click on the Start button then go to Control Panel > Programs > remove/uninstall Antivirus Software.
Windows Vista/7: Click on the Start button > go to Control Panel > Uninstall a Program or Programs and features > uninstall Antivirus Software.
Windows 8: From the Start menu, type Control > click on the Control Panel option from the search options > uninstall a program or go to programs and features > right-click on the Antivirus Software option from the list of programs and choose to uninstall option > click OK.
Windows 10: In the search bar situated at the left bottom corner of your screen, type Control > and click on the Control Panel option > go to uninstall a program or Program and Features > then from the list of programs right-click on the Antivirus Software and choose the uninstall option.
Read Next:
- Can’t Find the Name of Intel ICD OpenGL Driver
- TAP-Windows Adapter V9 Errors
- USB Device Descriptor Request Failed
- The Default Gateway is Not Available
Conclusion
The Windows couldn’t detect this network’s proxy settings error prevents you from using your network connection/ or internet on your computer. This error can be caused by any corrupted files/ malware present in your computer system. Sometimes, it leads to several changes in your system’s network proxy settings.
In this article, we have listed the proven and tried methods. Many users have found these methods useful to fix Windows Could Not Detect This Network’s Proxy Settings issue on their system. So, if you are facing this issue with your computer, then you can try these methods mentioned in this article. We hope that our solutions will help you get rid of this issue.


