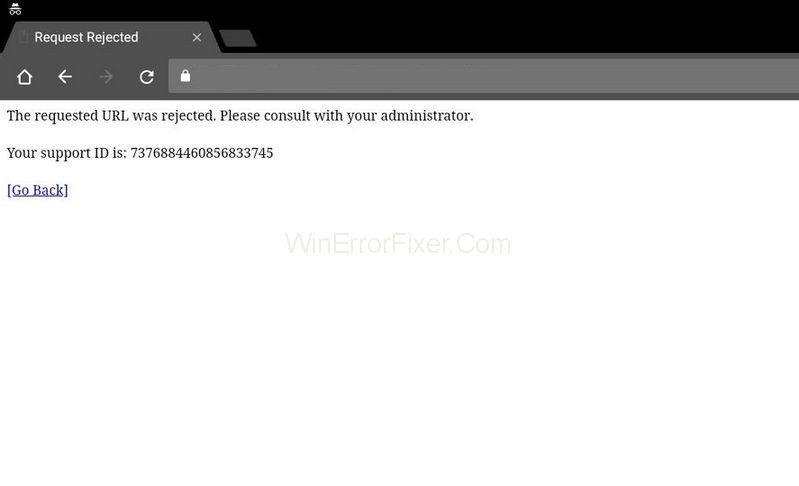
Most of us have been stuck in situations where due for some reason, we couldn’t access specific websites. This is quite bothersome, especially when we need to access those websites to accomplish our daily tasks. The Requested URL Was Rejected.
Please Consult With Your Administrator error can appear even on those websites that are guaranteed to be safe. The problem can arise due to many reasons, the most common one being that the website might be down for maintenance.
Further, verify if this is causing The Requested URL Was Rejected. Please Consult With Your Administrator Error error to visit the site www.isitdownrightnow.com and check if the website you are trying to access is down.
In this case, all you can do is wait for it to be repaired and reappear as usual.
In the digital age, browsing the internet is an everyday activity. While most interactions with websites are seamless, you’ve likely encountered an error message at least once. One such error message states, “The requested URL was rejected.”
Have you ever wondered what that means? Or, more importantly, how to fix it, particularly on an Android device? In this SEO-optimized, comprehensive article, we will cover everything you need to know about requested URLs and how to resolve “URL was rejected” issues.
What is a Requested URL?
A URL (Uniform Resource Locator) is the address used to access a resource on the internet. It specifies the location of a website, file, image, or any other form of digital content. When you enter a URL into your browser’s address bar, you are essentially making a “request” to a web server to access that particular resource. This is what is known as a “requested URL.”
What Does “Requested URL Was Rejected” Mean?
The error message “The requested URL was rejected” typically occurs when a web server has security measures in place that prevent unauthorized or suspicious access to its resources. It could be triggered by a variety of reasons, such as:
- Session Timeout: The session you were in has expired, requiring you to log in again.
- Firewall Rules: Some network security rules may restrict access to certain URLs.
- Cookie Issues: Corrupted or blocked cookies can lead to rejection.
- Browser Extensions: Some browser add-ons can interfere with website loading.
This error is the server’s way of saying, “I cannot fulfill your request to access this particular URL.”
The Causes of The Requested URL Was Rejected. Please Consult With Your Administrator Error
While it is crucial to diagnose accurately, the main cause of The Requested URL Was Rejected. Please Consult With Your Administrator error because it appears randomly.
Moreover, it doesn’t provide any helpful information about what might have caused the error. It is highly possible that the website is down for maintenance, and this is something that you can rule out before moving forward with troubleshooting.
There are few other reasons because of which The Requested URL Was Rejected. Please Consult With Your Administrator error might have developed. Like there might be issues with your internet settings, maybe you can either try adding the problematic website to the trusted sites list or remove it from the Managed Sites list.
Furthermore, the browsing data in your current browser may be excessive, and this is why the website might not be loading properly. So it is advised to clear your browser’s cache.
Solution 1: Clear Cache and Cookies
This method is most simple and productive as an enormous number of users have managed to resolve their issues by clearing the cache and cookies. Cache and Cookies are bits of information that the websites store on end user’s computers to enhance the quality and performance of their web pages.
Stored cookies on the user’s computer can support loading the sites faster. But sometimes when these cookies are piling up in the user’s browser it could block out specific sites. So follow this method sequentially and solve the issue.
For your convenience, independent of your choice, we have listed a number of browsers and how to clear the browsing data with regard to each one of them.
Solution 1.1: Google Chrome
Step-1: To clear the browsing data in Google Chrome, click on the customize Google Chrome menu button i.e., three vertical dots that are available at the top right corner of the browser. From the received drop-down list, search for more tools and then clear browsing data.
Step-2: To wipe out everything, choose the time slot as the beginning of time and select the data you wish to delete. We advise you to clear out the cache and cookies by pressing the clear button.
Step-3: Finally, restart the computer and check if The Requested URL Was Rejected. Please Consult With Your Administrator issue has been resolved.
Solution 1.2: Mozilla Firefox
Step 1: Click on the Firefox icon to open the Mozilla Firefox browser on your system. You will find it on the desktop or search for the same in the start menu.
Step 2: Select the History option from the horizontal menu located at the top and clear recent history. In case the menu bar is not visible to you, press the Alt key on your keyboard to make it visible.
Step 3: From the Time range to clear: drop-down menu, select your desired range. We recommend you choose “Everything” to clear your entire cache.
Step 4: Click on the down arrow found on the left side of the option Details. Through this, the user can keep a count of what data elements will be erased when you select the Clear history. To clear your entire cache, select all items.
Step 5: Click on the button Clear Now. Close all the browsers file and restart the computer.
Solution 1.3: Microsoft Edge
Follow the steps given below to clear your browsing data for Microsoft Edge:
Step 1: Start your Edge Browser by either clicking on its icon on the desktop or by locating the browser in the start menu and open it.
Step 2: click on the “Settings and more” button by pressing the Alt key + X on your keyboard. You will find it at the top right corner of the Edge browser window. You can see a button with three horizontal dots, click on it. Now select Settings from the drop-down menu.
Step 3: From the resulted menu, under the Clear Browsing Data section, click on the button labeled Choose what to clear.
Step 4: You will get a huge list of checkboxes for a number of elements that you can delete from the Edge. It is quite common to just delete the first four options from the list. Keep those options checked and clear this data by pressing the Clear button.
Solution 2: Add the Problematic Website to Trusted Sites
Adding URL(s) to trusted websites can be a boon as well as a bane. If the problem persists with few particular websites, your browser might be rejecting the URL reasoning it as malicious to protect your data.
In case you are sure that the website you are visiting is not harmful. You should visit the internet options in the control panel and add the respected site to Trusted Sites to circumvent certain security checks. We have explained how to do so in this article.
Step 1: Start your Internet Explorer on your computer by either clicking its icon on your desktop or searching for it in the start menu. Now click on the cog icon found at the top right corner of the browser. From the drop-down menu, select Internet Options to open a list of relevant connection settings.
Step 2: In case you do not have access to Internet Explorer, use the control panel. Go to the Start menu at the bottom left corner of the screen. Select it. Either search for the control panel there or press Windows key + R from your keyboard to open a run dialog box and type the “control.exe” command in the run box. Then click OK.
Step 3: As soon as the control panel is open, search for the Network and Internet option and click on it to use this section. Now, click on the Internet options button to navigate to the same window. Regardless of the application (Control panel or Internet Explorer), you are using. This will open the Internet Options window.
Step 4: A small window with an Internet option will appear on the screen. From the number of options in the menu, navigate to the Security tab, and select Trusted Sites and click on the button named sites. Here you can add the URL of the sites which you think are not a threat to the browser. Finally, press the button Add.
Step 5: Once you have added your desired website, scroll down and disable the “Require server verification option (HTTPS) for all sites in this zone” by unselecting the checkbox found under the websites.
Step 6: Exit the Internet Options window and close the browser. In the end, reopen the browser and see if you can successfully access the website where you had trouble.
Solution 3: Remove the Site from Managed Websites
If the above methods haven’t proven to be fruitful to you. We recommend you follow this method efficiently. Since you are familiar with Internet options learned from method-2.
In case you have added a particular website under Internet options, consider removing it for a while because this method has solved quite a few issues related to this error. Follow each step of this method to yield a productive solution.
Step 1: Start Internet Explorer on your system by clicking on its icon found on the desktop or from the Start menu. Click on the cog button found at the top right corner of the screen. From the drop-down list, select Internet options to open a small window on relevant connection settings.
Step 2: As mentioned in the above method-2, in case you do not have access to internet explorer, open the control panel.
Step 3: In the Control panel window, you will find a drop-down list at the top right corner named View as, select category from the list. Now click on the Network and Internet option to avail of this section. Innards this window, select Internet Options and click on it. Regardless of the application (Control panel or Internet Explorer), you are using. This will open the Internet Options window.
Step 4: Here, you will encounter a small window with Internet options on the screen. From the number of options in the menu, navigate to the Privacy tab, and click on the button named sites. Now check the managed websites section for the problematic website. In case you found the URL of any website, select it. Then, press on the Remove button to erase the website link. Finally, press OK.
Step 5: Exit the window and the browser. Lastly, restart the browser and check if you could access the website you were experiencing trouble with. Hopefully, this will solve The Requested URL Was Rejected. Please Consult With Your Administrator error.
How Do I Fix Rejected URL on Android?
If you’re facing this issue on your Android device, there are several methods you can try to resolve it:
Clear Cache and Cookies
- Open your browser app.
- Go to “Settings” and then “Privacy.”
- Select “Clear browsing data,” ensuring both “Cookies and site data” and “Cached images and files” are selected.
- Confirm the action.
Disable Browser Extensions
- Open the browser app and go to “Extensions” under “Settings.”
- Disable extensions one by one to see if any are causing the issue.
Check for Updates
- Open “Google Play Store.”
- Search for your browser app and check if an update is available.
- Update if needed.
Check Network Settings
- Ensure you’re not connected to a restricted network that may have firewall rules blocking your request.
- Switch to another network and try again.
Reset App Preferences
- Go to “Settings” on your Android device.
- Tap “Apps,” then click on the three-dot menu and select “Reset app preferences.”
- Confirm the action.
Consult Webmaster
If none of these steps work, it might be a server-side issue. Contact the website’s administrator or support for assistance.
Conclusion
We have carefully inspected the error and found a countable number of solutions to fix this issue. Each and every method will solve the “The Requested URL Was Rejected. Please Consult with Your Administrator” error.
The “Requested URL was rejected” error can be frustrating, but it often serves as a security measure to protect digital resources. Understanding what triggers these issues and how to tackle them, especially on Android devices, can make your browsing experience smoother.
Following the above-mentioned steps should help you resolve most instances of this issue, enabling you to continue your online activities uninterrupted.


