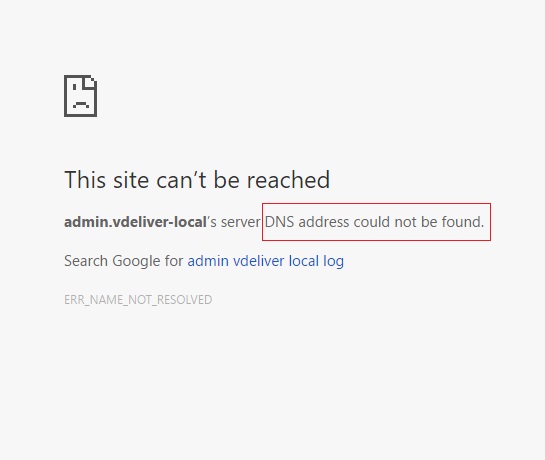
Google Chrome is the leading web browser owing to its efficiency, security, and other features. Its popularity notwithstanding, users do report having to face occasional problems while using it. A recurring error encountered by Chrome users is “Server DNS address could not be found.”
It occurs when the browser is unable to access a website. Chrome users on various Windows versions face it, be it Windows 8 or 10. This article is about the nature of the “Server DNS address could not be found” error, and the ways to fix it.
The Domain Name System (DNS) is an integral part of the internet, but it’s also one of the aspects users know least about. While it usually operates smoothly, you may encounter occasional hiccups such as the dreaded “DNS Address Could Not Be Found” error.
This SEO-optimized article aims to clarify what Server DNS is and explore the primary causes behind the ‘DNS Address Could Not Be Found’ issue.
What is Server DNS?
DNS, or Domain Name System, is often described as the phonebook of the internet. When you type a website URL into your browser, DNS servers translate that human-friendly domain name into an IP address, which is machine-friendly.
This IP address guides your system to the correct web server, delivering the website content back to your browser. In a nutshell, Server DNS helps you avoid having to memorize complex IP addresses by enabling you to access websites using simple domain names like www.google.com.
These servers play a crucial role in ensuring that internet navigation is smooth, quick, and user-friendly.
Causes of ‘Server DNS Address Could Not Be Found’
1. Incorrect DNS Settings
If your computer or network’s DNS settings are not configured correctly, you may encounter the ‘DNS Address Could Not Be Found’ error. This often occurs after installing a new router or modifying network settings.
2. Unresponsive DNS Server
Sometimes the DNS servers your network is pointing to might become unresponsive due to heavy traffic, maintenance, or other issues. When this happens, your system cannot resolve domain names into IP addresses, leading to the error.
3. Browser Cache and Cookies
Your web browser stores cache and cookies to speed up your browsing experience. However, outdated or corrupt files could conflict with DNS settings, causing the error.
4. Firewall or Security Software
Certain firewall settings or security software may block access to DNS servers. This interference can cause the DNS error message to appear.
5. Outdated Network Drivers
Old or incompatible network drivers could also cause DNS issues. Make sure your drivers are updated to avoid encountering this problem.
6. Website-Specific Issues
Sometimes the issue may not be on your end but with the website you’re trying to access. If the site’s DNS information is not updated or its server is down, you may experience the ‘DNS Address Could Not Be Found’ error.
What Is Server DNS Address Could Not Be Found Error?
Every website has an Internet Protocol (IP) address in numerals and a domain name by which people know it. When a user enters the domain name of a website in a browser, the browser contacts a DNS server.
The Domain Name System (DNS) server, in turn, matches the domain name of the website with its IP address. In this way, the browser can fetch the website for the user. However, the DNS server may often fail to locate the IP address for a domain name.
The browser is then unable to access the website, and the error message appears on the screen. This error can occur if for some reason the server is down, or if the local cache is sending an obsolete IP address.
Whatever be the cause, the user is unable to access the intended website due to this error. Fortunately, there are certain techniques to resolve this problem. Check the methods described below, and try them to fix the “Server DNS address could not be found” error.
Solution 1: Update the DNS
An effective way to fix such errors is to update the DNS by shifting to the Google Public DNS servers. Google’s public DNS service is free and open to all users. Following are the steps to change DNS settings to use Google servers:
Step 1: Open the Run dialog box by pressing the Windows + R keys and then type “control panel” and hit Enter.
Step 2: Select “Network and Internet” from the control panel.
Step 3: Select “Network and Sharing Center”
Step 4: Click the “Change adapter settings” option
Step 5: In the new window that appears, right-click your network connection icon and select Properties
Step 6: In the next small window that will open, you will find a list of network connection items. Among them, select Internet Protocol Version 4 (TCP/IPv4).
Step 7: Select “Use the following DNS server addresses” option from the next window. Then in the dialog boxes below, type the following DNS server addresses:
Preferred DNS server: 8.8.8.8

Alternate DNS server: 8.8.4.4
Then click OK.
Step 9: Reboot your device to check if the Server DNS Address Could Not Be Found error is solved.
Solution 2: Look Up IP and Add to Hosts File
If the server is trying to access an old IP of a domain, the error occurs. However, you can easily locate the new or correct IP of the domain and then add it to the Hosts file. It may fix the error. Follow the steps below to try this method:
Step 1: Open the whatsmydns.net website.
Step 2: In the search box, type and enter the domain name
Step 3: In the search results, note the most common IP address. It should be the correct one. Note it down.
Step 4: Now, go to the Start menu and select Notepad. Right-click its icon and select “Run as administrator.”
Step 5: In the Notepad menu, select File → Open.
Step 6: Now navigate to the following location:
C: \Windows\System32\drivers\etc
Step 7: In the file type category, select “All files.”
Step 8: Among the files that will appear, click and open Hosts
Step 9: At the bottom of the file, enter the IP address and domain name in the following format:
105.0.0.6 example.com
Supposing that the IP is 105.0.0.6, and the domain name is example.com
Step 10: Finally, save the file. Now check whether the Server DNS Address Could Not Be Found error persists or not.
Through this technique, the browser will try accessing the website locally by using the IP address provided already. It is not a foolproof method, but it can be tried if other methods fail.
Solution 3: Clear Host Cache
The error may be a result of the Chrome host cache getting full or any corrupted extension in it. Clearing the cache may fix the issue. Following are the steps to clear the Chrome host cache:
Step 1: Open an incognito window in Chrome by selecting the “New Incognito Window” option in the Chrome menu (three-dot icon). Alternatively, press Ctrl + Shift + N to open it.
Step 2: In the address bar of the incognito window, type the following URL and press Enter:
chrome://net-internals/#dns
Step 3: Look for the “Clear host cache” button and click on it.
Step 4: Additionally, try running a command to flush the DNS. Search for the ‘cmd’ and open Command Prompt as an administrator and then click on the “Run as administrator” option.
Step 5: Type the given command in Command Prompt and hit Enter:
ipconfig /flushdns
Check whether the Server DNS Address Could Not Be Found error has resolved after using this method.
How to Troubleshoot ‘DNS Address Could Not Be Found’
- Check DNS Settings: Ensure your DNS settings are correctly configured. You can do this through the ‘Network and Sharing Center’ on Windows or ‘System Preferences’ on a Mac.
- Flush DNS Cache: Use the command prompt to flush your DNS cache. The command is
ipconfig /flushdnsfor Windows users andsudo killall -HUP mDNSResponderfor macOS users. - Change DNS Servers: Switch to a different DNS server like Google DNS or OpenDNS to see if the issue persists.
- Clear Browser Cache and Cookies: Clean out your browser’s cache and cookies through its settings menu.
- Check Firewall and Security Software: Make sure your firewall or antivirus software is not blocking access to DNS servers.
- Update Network Drivers: Ensure that your network drivers are up to date.
- Test Another Website: Try accessing a different website to determine whether the issue is specific to one site.
Read Next:
- DNS_PROBE_FINISHED_NXDOMAIN
- The DNS Server Unavailable
- DNS Server Not Responding
- DNS_Probe_Finished_No_Internet
Conclusion
Thus, the various ways to solve the error “Server DNS address could not be found” in Google Chrome have been discussed. These methods are applicable if the problem is with the DNS. However, a website may fail to open if its server is down. Such a scenario is not in the user’s hands, and the only option is to wait for the website to get repaired.
Understanding Server DNS and the intricacies behind the ‘DNS Address Could Not Be Found’ error can save you a lot of frustration. While DNS servers function as the unsung heroes of the internet, they can sometimes falter.
Knowing how to troubleshoot issues can go a long way in ensuring a seamless browsing experience. With this comprehensive guide, you should be better prepared to tackle any DNS errors that come your way.


