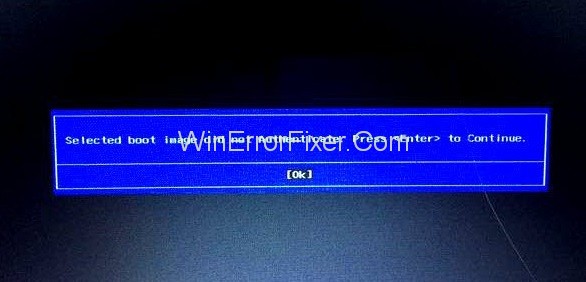
Often, users face a certain problem while starting or rebooting their computers. A blue box appears on a black screen, which says “Selected boot image did not authenticate, press Enter to continue“. Simply click “OK” or “Enter” to restart the computer. After this, you will return to the same screen instead of starting the system.
So, you need to fix this problem whenever it occurs. We have discussed the ways to fix Selected Boot Image Did Not Authenticate issue in this article. Firstly, we must understand what Selected Boot Image Did Not Authenticate problem is all about.
A boot image is a file that contains various data related to the operating system and helps load it. The system is loaded after the computer authenticates the system boot loader according to the system firmware database.
This process secures the device from any harmful system changes. The computer may fail to authenticate the boot loader due to various reasons:
1. Changes to the boot loader information due to new device installation or system upgrade.
2. Missing information on the boot loader.
3. Corrupted boot loader due to malware attacks.
The “Selected Boot Image Did Not Authenticate” error is a common and often frustrating issue encountered when attempting to boot from a USB drive. Understanding what causes this issue and how to solve it can make a significant difference in your ability to boot your system successfully.
In this SEO-optimized article, we’ll dissect the various facets of this problem, including enabling USB booting on HP computers, repairing boot from USB, checking Secure Boot settings without accessing BIOS, and removing security boot.
What Causes the “Selected Boot Image Did Not Authenticate” Error?
This error message often appears because of a conflict between the Secure Boot feature and your bootable USB drive. Secure Boot is designed to prevent unauthorized bootable drives and software from loading during the startup process, ensuring that only trusted software runs on the system.
Secure Boot
Enabled by default on many modern systems, Secure Boot checks the digital signature of the boot image against a database of trusted keys stored in the UEFI firmware. If the boot image isn’t signed or the signature doesn’t match, you’ll encounter this error.
Corrupt or Non-UEFI Boot Image
If the boot image on your USB drive is corrupt or not configured for UEFI, it may fail to authenticate, triggering this error.
Firmware/Software Conflicts
Sometimes, a firmware update or software change can cause conflicts, leading to authentication failures during boot-up.
How to Fix Selected Boot Image Did Not Authenticate Error
Many of the Windows users are facing this issue. Even the latest version Windows 10, notwithstanding its popular features, experiences this issue. We have also observed that users of HP devices particularly face Selected Boot Image Did Not Authenticate error.
It says about the boot image authentication failure. This is mainly linked to upgrades, because it may cause changes to boot loader information. Thus, the ways to solve this problem have been discussed below.
Read Also:
Solution 1: Change from Secure Boot to Legacy Boot in BIOS Settings
This method is suitable only when the error is not because of any malware attack. It lets the system boot by disabling the Secure boot feature and overriding the security protocol. Following are the steps in this method:
Step 1: Shut down the computer and then turn the power on again.
Step 2: Press “Esc” repeatedly to go to the Startup menu.
Step 3: Press “F10” to enter BIOS once the Startup menu appears, then navigate the options using the arrow keys
Step 4: Select “System Configuration” in the top menu.
Step 5: Select “Boot options.”
Step 6: Disable the “Secure boot” option and enable “Legacy support.”
Step 7: Press “F10” to save and exit.
This should cause Windows to reboot automatically with the saved changes. However, this should serve as a temporary solution. The Secure boot feature is crucial to prevent malicious content and must be re-enabled after the problem is fixed.
Besides, if the Selected Boot Image Did Not Authenticate problem is due to a malware attack, method three given below is recommended.
Read Also:
Solution 2: Hard Reset the computer
This is another way of solving the Selected Boot Image Did Not Authenticate problem, in which the BIOS configurations are reset. This will remove all mismatching configurations and allow a successful boot. Following are the steps in this method:
Step 1: Turn off the computer and disconnect the power cord.
Step 2: Remove the battery from behind the computer.
Step 3: Press and hold the power button for about 20 to 30 seconds to reset the hardware.
Step 4: Put the battery back in and connect the power cord.
Step 5: Restart the computer.
Step 6: As the computer starts, press “Esc” repeatedly for the Startup menu.
Step 7: Once the Startup menu appears, press “F2” to load hardware diagnostics.
Step 8: Select the “Startup test” option to test the entire hardware of the system to diagnose any problems.
Step 9: If the test reports no problem, the computer can be rebooted frequently.
If you still face the Selected Boot Image Did Not Authenticate error, or if the Startup test reports any problem, the system needs repair.
None of those mentioned above techniques may work if the problem is due to a malware attack. In that case, the system needs to be repaired. The repair process can be done by following the steps below:
Step 1: Firstly, turn off your computer. Now, turn it back on after a few seconds
Step 2: Just as the computer starts, press “Esc” repeatedly for the Startup menu to appear
Step 3: Once the Startup menu appears, press “F11” to go to the recovery console
Step 4: Select “Troubleshoot”.
Step 5: Then select “Advanced Options”.
Step 6: Finally, select “Startup Repair”.
Step 7: Follow the instructions that will appear on the screen. Now, wait for the repair process to finish.
Step 8: Once it is finished, restart your computer.
What Does Booting from USB: “Selected Boot Image Did Not Authenticate” Mean?
When you try to boot your computer from a USB drive and encounter this message, it essentially means that the system’s Secure Boot feature has stopped the boot process because the USB drive’s image doesn’t meet security criteria.
It could be due to a corrupted boot image, a non-UEFI compatible image, or a firmware update that interferes with the boot process.
How Do I Enable USB Boot on My HP?
- Turn off the computer.
- Turn it back on and immediately press the
F10key repeatedly to enter the BIOS Setup. - Navigate to the ‘Boot Options’ menu.
- Under ‘Boot Order,’ move ‘USB Device’ to the top of the list.
- Save changes and exit BIOS.
- The computer will restart, and if your USB drive is bootable, it should boot from it.
How to Repair Boot from USB?
- Recreate Bootable Drive: If your bootable drive is corrupted, you’ll need to recreate it using reliable software.
- Check for UEFI Compatibility: Ensure that your bootable drive is compatible with UEFI.
- Disable Secure Boot: In some cases, disabling Secure Boot temporarily can help bypass the issue.
How to Check Secure Boot Without BIOS?
On Windows 10 or Windows 11:
- Right-click on the Start button and select ‘Run.’
- Type
msinfo32and press Enter. - The System Information window will open. Under ‘System Summary,’ look for ‘Secure Boot State.’ This will indicate whether Secure Boot is enabled or disabled.
How Do I Remove Security Boot?
- Enter BIOS Setup by pressing the BIOS access key during startup (often
F2,F10, orDEL). - Navigate to the ‘Boot’ or ‘Security’ menu.
- Locate the ‘Secure Boot’ option and set it to ‘Disabled.’
- Save changes and exit.
Warning: Disabling Secure Boot can expose your system to risks. Ensure you know what you’re doing and re-enable it as soon as possible.
Also Read:
- The Active Directory Domain Services is Currently Unavailable
- No Audio Device is Installed
- The DNS Server Unavailable
- Plugged in Not Charging
Conclusion
Thus, we have described the various ways to fix the boot image authentication error. The user must first have an idea about the cause of the error, as the techniques are suited based on the causes.
The first two methods must suffice if the Boot loader causes Selected Boot Image Did Not Authenticate error. Information change due to system upgrade or new installation. In case of changes due to malware attacks, system repair is necessary.
These techniques are easy to use once understood. This will help you whenever you face the Selected Boot Image Did Not Authenticate error.
The “Selected Boot Image Did Not Authenticate” error can be a roadblock, but understanding its underlying causes can provide insights into how to resolve it.
By mastering the different aspects such as enabling USB boot, repairing a USB boot drive, and understanding Secure Boot, you can navigate these errors more confidently.
Always remember to follow best practices and take necessary precautions when modifying system-level settings.


