Screen Recording Software is usually for those who want to capture computer screen while they perform the task. Thus, generally, it is of great help to Gamers all over the world. Then the recordings can be used for preparing YouTube videos.
You can upload Gameplays of certain video games. Presenters can easily make the audience understand a certain topic which the assistance of audio and visual techniques. Application developers also generally show their target audience the features of the app.
Thus, it induces the customer as they can see the functionalities of the app and the user interface. And screen recording software also finds applications in software demonstrations where you can show how a particular software is going to work, what are its functionalities and features.
With editing features, you can insert texts, captions, arrows, or other markings; you can create a tutorial and How-to videos.
For professional users, many other features are provided by screen recorders at modest prices. The best part about Screen Recording Software tools is that they deliver complex functionalities using simple interfaces.
In today’s digital age, the need to capture and share on-screen activities has skyrocketed, whether for tutorials, presentations, or just sharing memorable moments from a video call. That’s where screen recording software steps in. Let’s dive deep into what screen recording software is, its benefits, and more.
What is Screen Recording Software?
Screen recording software is a specialized tool that allows you to record video and audio outputs from your computer screen. Essentially, it captures whatever is happening on your screen in real-time, creating a video file that can be played back, edited, and shared.
10 Best Screen Recording Software for Windows
Given below is the list of top 10 Best Screen Recording Software for Windows. The list includes all the reasons you should try these screen recorders and more.
Let’s begin!
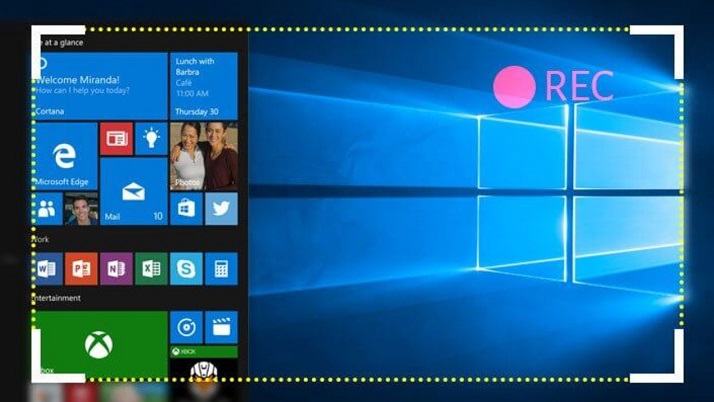
1. Windows 10 Screen Recording
There is a good chance that you have been using Windows 10 for quite a long time. But that doesn’t mean you have explored everything the platform has offered. There are some “hidden features” which may not have come to your notice.
For example, it has a screen recording system that appears in the GameBar. To start the recording, you have to press the ‘Windows‘ button + ‘Alt‘ button + ‘R.‘ You can also capture screenshots.
2. Ezvid
Ezvid for Windows is a full-featured screen recorder and video editor, that has been used to create countless videos for Facebook, YouTube, and other user-generated content websites. It is a recording tool which has a bunch of modest functionalities.
Apart from having a built-in video editor, you can also split the record and add text in between two video clips using Ezvid, which can be fabricated into a slideshow effect. And with a ‘Gaming Mode,’ you can record the windowed mode of the games you play.
Ezvid comes with a few music tracks also. You can opt for the silent machine if you don’t want any background music. You can even insert your voice or other pictures in the video. Ezvid has some impressive features such as screen drawing, voice synthesis, speed control, and much more.
3. Rylstim Screen Recorder
Rylstim Screen Recorder allows recording events happening on the monitor, which includes the mouse pointer and the visualization of the regular and right clicks of the mouse buttons. The initial setup does not require any special skills as such.
And you can get started with video recording once you have selected the required video codec. Rylstim Screen Recorder has a basic layout with no complications. To start your recording, all you need to do is to press the ‘Start Record’ button.
The only thing which needs your command is the frame rate and the choice to show left or right clicks on the recorded videos. When you enable them, the final output will show red ripples to represent left clicks and green ripples for right clicks.
It can be used for tutorial videos. You can also decide where to store the final output video. Rylistim Screen Recorder does not, however, give you the options like reducing the window size or adding text and other edits. Rylstim Screen Recorder has a straightforward user interface.
4. Webinaria
Webinaria is a free screen recording software which doesn’t impose any watermark restrictions or other limitations. This tool can be used to create videos for recording software demonstrations and tutorials. You can insert texts in the video using Webinaria.
The accompanying audio can also be recorded or turned off according to your choice. Webinaria also allows you to capture the whole screen or a single window or just a portion of your screen. In a nutshell, Webinaria is an outstanding solution for recording screencasts.
5. Flashback Express Recorder
Flashback Express Recorder is a production software of Blueberry. It is available in three versions viz. Free, Plus, and Pro. The free version of Flashback Express Recorder has the basic features such as recording from the screen or webcam and also recording the audio.
You can set the window size and insert texts at relevant places in Flashback Express Recorder. The final product can be uploaded to YouTube or exported to AVI or Flash. The Plus version of Flashback Express Recorder is available in the store for $89.
Although the recording options are almost the same, you get further options to export the recorded video. It can be exported to QuickTime, MS PowerPoint, or even shared via FlashBack Connect. You can add annotations, text boxes, and cursor highlights.
The best features lie in the Pro version of Flashback Express Recorder, which is worth $199. In addition to the other features, you have provisions for editing the video and adding zoom, blur, and other effects.
6. DVDVideoSoft – Free Screen Video Recorder Software
Why is DVDVideoSoft Free Screen Video Recorder impressive? Keep reading! The DVDVideoSoft Free Screen Video Recorder records screen activities that include onscreen changes, mouse movements, and speech from microphone.
It also captures multiple windows and objects, including multi-level menus. Resize, crop, and rotate output images using DVDVideoSoft Free Screen Video Recorder. It records your screen video to MP4 files. DVDVideoSoft Free Screen Video Recorder highlights your cursor path for clarity.
DVDVideoSoft saves in BMP, GIF, JPEG, PNG or TGA formats. Runs when Windows starts (optional). DVDVideoSoft Free Screen Video Recorder possesses no adware or spyware. Records video with sound (from the microphone). As the name suggests, DVDVideoSoft Free Screen Video Recorder is free and safe to be installed and run.
7. Krut
Written in Java and well suited for making video tutorials, Krut is imposing in recording movie files, including sound, of selected parts of your screen. The data use the MOV format. Krut has a compact and intuitive user interface.
It doesn’t require installation but needs Java to run. So after downloading Krut, you will have to run the .jar file to get started. You can record videos with or without the audio in Krut. The window size can also be decided as you wish.
8. AllCapture
AllCapture has functionalities to edit and add effects to the recorded videos. These are ideal for tutorials. Besides, MS PowerPoint presentations can be converted into videos for demonstrations using AllCapture. You can also add notes and captions in the videos.
A nine-day free trial of AllCapture is available without any registration. And with registration, an extended 30-day trial can be availed. For prolonged use, you will have to get the paid versions of AllCapture. Pricing is different for Basic (€ 169) and Enterprise (€249) versions.
9. HyperCam
HyperCam is a screencasting program that is created by Hyperionics and Solveig Multimedia. It captures the action from Microsoft windows and then turns it into AVI (Audio Video Interleave) or WMV (Windows Media Video) or ASF (Advanced Systems Format) movie file.
HyperCam also records all sound output, and sound from the system microphone. HyperCam is primarily creating Software presentations, walkthroughs, demonstrations, tutorials, and numerous other tasks the user wants to demonstrate.
The latest versions of HyperCam also capture overlay video and can re-record video clips and movies (e.g., recording videos playing in QuickTime, RealVideo, Windows Media Player, etc.) The version 3.0 of HyperCam also includes a built-in editor for merging and trimming captured WMV, ASF, AVI files.
The unregistered versions of HyperCam 2 and HyperCam 3 ask to register on every startup and apply a digital watermark in the upper-left corner of all the files recorded. Base registration that costs $39.95 can eliminate this watermark. HyperCam 2 has been made permanently free download for “worldwide use” by Hyperionics.
10. GoView
GoView is a free Screen Recording Software from Citrix Online. It allows you to capture videos and screenshots and upload them on various sharing websites. The videos can be edited, and effects can be applied. Title slides can be inserted as separators within the video.
The screen selection in GoView is also comfortable with the snipping tool. There is a 30-day free GoView trial, and GoView paid versions can be bought after that. GoView is available in Starter, Pro and Plus versions.
How can I Record my PC Screen?
- Choose a Screen Recording Software: There’s a plethora of software available – from free tools like OBS Studio to premium ones like Camtasia.
- Install and Launch: Once you’ve picked your preferred software, install it and open the application.
- Select Screen Area: Some tools allow you to choose the full screen, a specific window, or even a custom area for recording.
- Adjust Settings: Set your preferred video and audio quality, choose the output format, and select if you’d like to capture audio (either from the system, a mic, or both).
- Start Recording: Once everything is set, hit the record button. Perform the actions you wish to capture.
- End & Edit: Stop the recording once done. Most software offers basic editing features to refine your video.
- Save & Share: Finally, save your recording and share it as needed.
Benefits of Screen Recording Software:
- Easy Demonstrations: Showcase software functionalities or create tutorial videos with ease.
- Feedback and Reviews: Record and share feedback on digital content or conduct software reviews.
- Gaming Highlights: Gamers can capture their epic moments and gameplays.
- Online Resources: Educators can create online lessons or lectures.
- Troubleshooting: Record issues to get technical support without lengthy explanations.
- Content Creation: A boon for content creators on platforms like YouTube.
Is Screen Recording Software Safe?
While most reputable screen recording software is safe, it’s vital to:
- Download from the official website or trusted sources.
- Ensure the software doesn’t capture sensitive information unintentionally.
- Regularly update the software for the latest security patches.
Is Screen Recording Software Free?
There’s a mix of free and paid screen recording software available:
- Free Software: Tools like OBS Studio and ShareX offer robust screen recording features without any cost.
- Paid Software: Premium software like Camtasia or Snagit provides advanced editing tools and features, justifying their price tag.
- Freemium Software: Some tools have both free versions with basic functionalities and paid versions with advanced features.
Additional Software Guides
- 7 Best USB Bootable Software for Windows 10, 8 and 7
- Hard Drive Recovery Software for Windows 10
- Android Data Recovery Software With Pros and Cons
- IP Camera Software and IP Camera Viewer in 2020
Conclusion
All these Screen Recording Software are compatible with the latest Windows, such as 7, 8, and 10. They are easy to use and have pretty cool User-Interface. Screen Recording Software help everyone be it an Education Institution, Application Developers, or Businesses.
With the help of mirrors, there’s no question on which screen to follow, what to click next, or the steps to complete a task. Most of them offer essential features for free. But the features such as blur, zoom, text boxes, and special effect tools are worth every penny you spend on them.
They give you a real recording and editing studio experience. Even the screenshots can be captured, and essential parts of it can be highlighted. By the inclusion of audio, you can give a live commentary of what is being recorded or play some track in the background.
And with the screen selection feature, only the essential part gets recorded, and you can easily omit the rest. These are ideal for your presentations or even for your personal use. With easy sharing to YouTube, releasing your work is much more comfortable.
You can also save your creation to your device if you want to keep it private. Give it a shot, and then let us know your views regarding the same!


