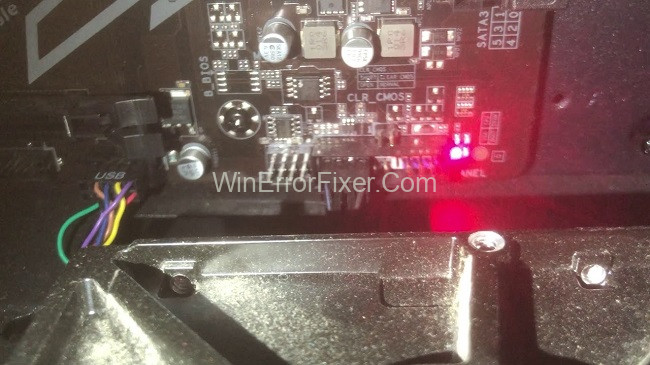
When an error happens in your system, it’s likely that the Motherboard’s red light will turn on. When components are missing or malfunctioning, the Motherboard will emit a flashing red warning signal.
However, Motherboard’s red signal appears in a variety of situations for various people. Some people may see a red light if there is a hardware problem, while others may see a when there is a RAM problem.
A motherboard is the heart of a computer, hosting its most vital components and orchestrating their performance. Despite its pivotal role, understanding the intricacies of a motherboard can be a daunting task. One frequently asked question involves the red light indicator on the motherboard.
What does it signify? Is it a warning sign? Specifically, Asus motherboard users often wonder how to fix a red light issue. This comprehensive article is designed to shed light on these topics.
What is a Motherboard?
The motherboard is the primary circuit board inside your computer, acting as the nervous system that connects all hardware components like the CPU, RAM, and hard drives. It also includes ports for connecting peripherals and slots for installing additional hardware.
Causes of Red Light on Motherboard
1. Power Supply Issues
Inadequate or unstable power supply can trigger the red light.
2. Component Failure
If any of the key components like CPU or RAM are failing, the red light may turn on.
3. Overheating
Extreme heat can cause the motherboard to activate the red light as a warning sign.
4. BIOS Errors
Sometimes, outdated or corrupted BIOS settings can activate the red light.
What Does a Motherboard Red Light Mean?
When the red motherboard LED lights up, it’s a sign of trouble, be it a faulty connection or a piece of vital hardware that has been damaged.
Read Also:
Sometimes you’ll hear a beeping sound and see a flashing red light, and vice versa. All of these issues point to the necessity for urgent system maintenance.
The Solution: How Can I Fix the Red light on the Motherboard?
Being aware of the problem is obviously insufficient. Some solutions to this problem have been discussed above (playing with RAM or GPU). However, you can also try a few other things to see if any of them work to resolve the problem.
And the below guidelines will assist you in getting back to normal. Some of these are simple to carry out, while others may necessitate the replacement of certain parts. Come on, then, let’s get started.
Method 1. Reset BIOS
One of the best and quickest first steps is resetting the BIOS. It’s likely that this will be the last stage of your work. The basic input/output system (BIOS) is a complex software application required by all computers to boot up normally.
It’s remarkable how a single tweak in this area can yield dramatically different outcomes (such as blinking red light). How do I clear the BIOS, though? To do so, simply remove the CMOS battery. After five minutes, plug it in again.
The CMOS jumper is an alternative method of resetting the BIOS. The CMOS battery has a three-pin jumper on one side. In most cases, you’ll want to set it on either of the two pins (1 and 2, or 2 and 3). After five minutes with the jumper in the opposite position, you should reconnect it to its original pins.
The process of getting going should now go swimmingly for you. Select an alternate strategy if the warning sign persists.
Method 2. Remove Hardware
Now is the time to remove all hardware from the motherboard so that it can be examined. In order to prevent damage to the motherboard, you should first disconnect all of the cables and remove any devices that may be attached to it.
First, do the simplest thing possible before starting the inspection. A dry, smooth cloth should be used to clean the motherboard. One of the byproducts of any machine is the deposition of dust, and this is no exception.
Next, check each piece of hardware individually. Verify that everything is in working order, and then clean it. Time to check out those plugs and sockets. Get as much grime out of the connectors’ pins and ends as you can.
Additionally, inspect for any parts that are the wrong form. Do not freak out if you discover such a thing. With the help of a tiny screwdriver, you can solve or push it to get things going again.
Method 3. Replace CMOS
Worse yet, what if restarting the BIOS didn’t stop the blinking red light? There may be an issue with the CMOS battery if this occurs. It’s possible that you’re having this problem for the first time since you’re using an older computer.
In order to fix this problem, try installing a new CMOS battery. But unless you know for sure that the issue is confined to this location, it’s not worth spending the money.
Method 4. Storage Device Check
It’s possible you’ll need your pals’ assistance with this. Replacing your storage device is a good way to recheck the booting procedure. There is an issue with the primary system, and it could originate from any component, including the storage device.
A good way to find out if the computer is working again is to borrow a storage device from a friend and try it out.
What is the Red Indicator in a Motherboard?
The red light indicator on a motherboard serves as a diagnostic tool. It helps to identify problems related to hardware components or power supply. This is especially true for modern motherboards like Asus, which come equipped with LED lights that help in troubleshooting.
How to Fix the Red Light on Asus Motherboard
Step 1: Check Power Connections
Make sure all power cables are securely plugged in.
Step 2: Inspect Components
Look for any damaged or loosely connected components like RAM, GPU, or CPU. Re-seat them if necessary.
Step 3: Monitor Temperatures
Use software tools to monitor your system’s temperature. If overheating is an issue, improve your cooling setup.
Step 4: Update BIOS
Sometimes, an outdated BIOS can cause issues. Check for updates on the manufacturer’s website.
Step 5: Reset CMOS
As a last resort, you can try resetting the CMOS battery to restore default settings. Make sure to consult your motherboard manual before proceeding.
Is Red Light on Motherboard Bad?
The presence of a red light on the motherboard is not inherently bad; rather, it’s a diagnostic feature designed to help you understand what might be wrong with your system. Ignoring it, however, can lead to serious issues in the long run.
Read Also:
- BLZBNTAGT00000960
- Application Suspending in 15 Minutes PS4
- How To Resolve the PR_CONNECT_RESET_ERROR
Conclusion
I appreciate you taking the time to read this. Your red CPU light should be resolved after reading this post. If none of the above worked, double-check that you did everything exactly as described, and try unplugging and reconnecting each component to see if the red light goes out.
If that doesn’t work, you should probably talk to an IT expert in your area before giving up on the computer entirely. It’s possible that they can figure out what’s wrong and fix it without having to ship it out.
While the red light indicator on a motherboard can be a source of anxiety, understanding its purpose and troubleshooting methods can alleviate many concerns. Whether it’s power supply issues, component failure, or BIOS errors, various factors can activate this red light.
Thankfully, modern motherboards like those from Asus offer sophisticated diagnostic features to guide you in resolving any issues.


