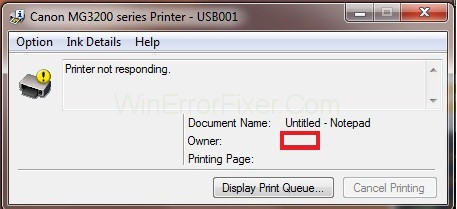
At present, we can be using both Laptop or PC for work. So there are often various situations that require the connection of many external devices with the main body. These external devices include printers, speakers, etc. While using the external device as a printer often comes across a message which is disturbing for all of us. This message is ‘Printer is not responding’. This usually happens when we are trying to print something using our printer, connected to the device.
What Causes Printer Not Responding?
There are various causes that are predicted behind the Printer is not responding error. Some of the causes are listed below:
Read Also:
- Focus on Enhancing the Relationship with Your Husband
- Turn On Bluetooth On Windows 10
- Download YouTube Videos
1. Printer is Not Connected Correctly
If this is the case, then the device will not recognize the printer attached to the device as an external device. So, the very first cause that is predicted for the popping up of the Printer not responding message is the connection fault.
2. Check Printer’s Connection Port
Now this situation might look a bit similar to that of the first one. If any external device is not connected to the main device, in this case, it can be a laptop or a PC, and then the device is not recognized. Every device, especially the external devices, are assigned different ports that are specific to their functions. The devices, when are connected to the main body through the correct port, then, in that case, will work normally. But if the external devices is not connected to the main body through the correct port, then the main device will not recognize it, and the user cannot function normally.
So is the case with the printer. Once the printer is connected to the device through the main port the printer will work normally, and if not connected, then there will be a problem, and the user will be facing the message of Printer not responding.
3. Use Troubleshooting
The reason when not found out, then we are advised to use the universal solution. That is troubleshooting. This can be done if we are facing a problem with any external device not only specifically for the
There are different troubleshooting options for different devices. We need to select, and automatically the troubleshoot will start. In most cases, it will resolve the problem of the Printer not responding.
4. Update Issues
There are updates issues with the device as well. Sometimes due to a lack of updates, the external devices are not compatible with the main device. So it is always advised for the users to have a check on the updates that are available and keep a note with it.
It is no doubt that the updates released by Windows are often too many, and that too released too soon. So it becomes a problem for the user to know about all the updates that are available.
5. Print Spooler Service
Last but not least is the Print Spooler Service. We are not talking much about it here because it has already been described in the best way possible in the solution section. So do have a check there.
How to Fix Printer Not Responding in Windows 10, 8 and 7
In the above paragraphs, the causes are just predicted. So as we move further in the article, we will be dealing with the steps to attain the solution to printer not responding.
Each solution has touched the different sphere of the predicted causes and have described the steps along in a pictorial way, so the readers have an easy gasp while reading the article.
At the end of the article, there will be a conclusion section, which will be having an entire summary of the article.
So let us begin with the solution one by one.
Solution 1: Checking Hardware
The very first step to begin with fixing the printer is to check whether all the hardware components are in the proper condition or not. So before we move to troubleshoot, we need to check whether the printer is correctly connected to the device. This connection can be made through the wired connection or wireless network.
At first, the user can do the following:
Step 1: The user can try changing the cables. Or the user can also reset the wireless network. After doing, just check whether the printer is working normally or not.
Step 2: The user can also restart the printer, router, and device, used by the user. This will help the entire power to drain away completely.
Step 3: Remove the cables and keep them aside for a few minutes. Then plug them back into the device.
Step 4: The user can also try printing by connecting the printer to some other device. Check whether the printer is working successfully or not.
If the problem was with the hardware, then this solution will no doubt solve the issue. But in case the printer is still not working and the Printer not responding message is showing up, then try the other solutions listed below.
Solution 2: Restarting Spooler Service
Before we begin with the steps, we need to know a bit about the Spooler Service. So basically, the Spooler Service aims at managing all the print jobs. The Spooler Service is a software which is mainly responsible for the controlling of every Printable job that has been sending by the computer printer.
The service provided by the Spooler Service, in most cases, is visible to the users. Therefore the users can even cancel a print job that is under execution if they want. Moreover, the Spooler Service also gives the users the freedom to control and manage the printable jobs on the waitlist, and ware needs to be executed in the coming time.
Sometimes the problem of the printer not connecting to the device can be solved if the Spooler Service is restarted. Here are the steps to restart the Spooler Service.
Step 1: We have to begin the process by pressing Windows + R. This is done to launch the Run Application.
Step 2: Once the Run application is launched, a dialogue box will be provided to the user. The user is required to type services.msc in the dialogue box.
Step 3: The user will then have to press Enter to continue.
Step 4: After pressing the Enter button, a list of services will be provided to you. We have to locate the service Print Spooler on the list.
Step 5: Once we have located the Print Spooler in the list provided to us, we have to double-click on the Print Spooler.
Step 6: A list will appear where we have to click on Properties.
Step 7: Then, we have to select the Stop button. This Stop button will be present below the status bar of the system.
Step 8: To save the changes, click on, OK.
Step 9: The steps mentioned above will make sure that the service is disabled. So it is time for the user to shift the focus from disabling the service to deleting the printer files.
Step 10: The user is required to press Windows + E. This is done to launch quick access.
Step 11: There will be an option. This PC present on the left side of the navigation plane. Select the This PC option.
Step 12: The user is then required to move to the following path:
C:\Windows\System32\spool\PRINTERS
Step 13: There might be a prompt message asking for permission to move to the respective folder.
Step 14: Then, to carry on with the process, press the Continue option. Step 15: Once the user is inside the folder. Delete all the files which are present in the PRINTERS folder.
Step 16: Then, the user will have to close the window and exit from the folder.
Step 17: Then move to the Services Tab.
Step 18: Once inside the Services Tab, we have to activate the Start the Printer Spooler Service.
Step 19: The user should make sure that the startup type should be selected as Automatic.
Step 20: Finally, in the end, restart the device and check if the problem persists.
In most cases, the users will find the solution to their Printer not responding problem. If the problem is solved, then continue with the normal functioning, otherwise move to the other solutions.
Solution 3: Running the Printer Troubleshooter
One of the solutions to resolve the Printer not responding problem is to troubleshoot the printer. Windows are having various troubleshooters build in them already. These troubleshooters are categorized into various types and are meant to resolve various kinds of problems.
So to run the Printer Troubleshooter, we are required to follow the various steps that are mentioned below.
For Windows 10 Users:
Step 1: Begin the process by pressing the Windows Key + I.
Step 2: Then, the user will have to open the Settings App.
Step 3: Once inside the Settings application, we are required to go to the Update and Security section.
Step 4: There will be an option of the left side, containing the Troubleshoot option.
Step 5: On the right plane, there will be a Printer; select the option.
Step 6: Then, we have to select the Troubleshooter button.
Step 7: The user at this stage of the process will find that a list of instructions will be provided on the screen. The user will have to follow all the instructions carefully. Do keep in mind that any wrong selection or carrying out of wrong instructions will hamper the process. So follow the instructions carefully.
Step 8: Once the troubleshooter is completed, the user will have to restart the device.
For All the Other Users:
Step 1: Begin the process by pressing Windows Key + R.
Step 2: A dialogue box will appear. The user will have to type Control Panel in the dialogue box.
Step 3: Then, we have to press the Enter button.
Step 4: Once inside the Control Panel. Move to the search bar. Type troubleshoot. This will be present on the top of the right side of the window.
Step 5: A list of options will be provided; select the option of troubleshooting from the list of options that will be provided.
Step 6: In the troubleshooting menu, click on the View All. This option will be present the left-hand side of the navigation plane of the window.
Step 7: The above step will make sure that Windows activate all the troubleshooting programs present on the device.
Step 8: Then, the user will have to move to the option which says Printer.
Step 9: Then click on the OK option to continue with the process.
Step 10: Select the options, Run as administrator, and Apply repairs automatically. These options, when activated will make sure that all the problems are repaired at a faster rate.
Step 11: The user at this stage of the process will find that a list of instructions will be provided on the screen. The user will have to follow all the instructions carefully. Do keep in mind that any wrong selection or carrying out of wrong instructions will hamper the process. So follow the instructions carefully.
Step 12: Wait for the troubleshooting to complete.
Step 13: In the end, the user is required to restart the device and check whether the problem persists or not.
Troubleshooting is one of the most efficient and essential solutions to problems related to any external device. So most of the users will find a solution to the problem of the Printer not responding. If so, then continue with the work without interference; otherwise, other solutions are left to be tried.
Solution 4: Configuring to Correct Port
There are chances for the printer to be connected to an incorrect port of the device. If this is the case, then the printer will not respond no matter whichever solution we apply. So, in this case, the user is required to configure the ports. This step is usually performed using the Control Panel. Just follow the steps given below to change the configuration of the port.
Step 1: Begin the process by pressing Windows Key + S.
Step 2: Open the Control Panel application.
Step 3: Move to the Devices and Printers section and select the option.
Step 4: There will be a list provided to the user. Locate the Printer the user is operating with and select it. For selecting the option, we need to right-click on it.
Step 5: Move to the Port tab section.
Step 6: A list of ports will be available for the user.
Step 7: Select the checkbox which will be containing the printer of the user. In most of the cases, the one that is listed is Brother DCP-1610W in USB001.
Step 8: Check the Brother DCP-1610W in USB00.
Step 9: Click on Apply to save the changes.
Step 10: Restart the device and check if the problem persists or not. In most cases, the users will find the solution to their Printer not responding problem. If the problem is solved, then continue with the normal functioning, otherwise move to the other solutions.
Solution 5: Updating Printer Drivers
Updating the Printer’s drivers is the last solution that is advised to the readers to follow, in case they are facing the problem of printer not responding.
It is always advised for the users to move to the official manufacturer’s site to download the latest available printer drivers update. But the user should be careful while downloading the printer drivers update. All the updates may not be compatible with every kind of device. So while downloading, the user should be careful and choose the correct updates available for the device.
To know which of the updates is meant for the device and will be compatible to work, the user should have a look at the model number of the printer. This model number is usually present on the front of the printer or inside the box of the printer.
Follow the steps given below to update the drivers of the printer.
Step 1: Press Windows Key + X or choose the Device Manager option from the list of options given. This will open the Device Manager.
Step 2: There will be a list of services provided to the user. Choose the printer from the list of devices that will be given.
Step 3: Right-click on the Printer option and select the Update driver option.
Step 4: There will be many options. Choose the option which says Search automatically for updated driver software.
Step 5: The user is required to select the driver file, which has been downloaded.
Step 6: Update the driver file accordingly.
Step 7: Restart the device and check if the problem persists or not.
This is the last solution to the problem of the Printer not responding, and the user is bound to resolve the problem with this solution.
Read Also:
Conclusion
In this article, we have to bring forward the fact to the readers that, when we are pressing the print option on our device, may it be the laptop or the PC, the process of documents to get printed can be interrupted by many factors.
We have also discussed the factors, like driver problems, any software issues that might be existing, or some sudden hardware failures or even, in some cases, overuse. These are some of the numerous factors that prevent the printer from working properly. And even in some cases, the main body, which can be a Laptop or a PC, fails to identify the printer, the user is shown with a message that says Printer is not Responding.
So in this article, we have moved through all the solutions one by one. The solutions started with checking the hardware, which is undoubtedly the basic task to be performed by the user. Followed by the Restarting of the Printer Spooler Service. We have also given a small introduction about the Spooler services to make it more understandable.
The third solution included Printer Troubleshooter. This solution has been classified into two types. The first is exclusively for Windows 10 users. And the other is for the users of another operating system.
The fourth solution included the correct port configuration. And lastly, it ended with the updating of printer drivers.
We have tried to touch all the spheres regarding the fixation of the Printer not responding problem. I hope the readers who were facing the same problem will find a solution through this article. Described in simple steps, the aim was to make the article understandable to all the kinds of readers.


