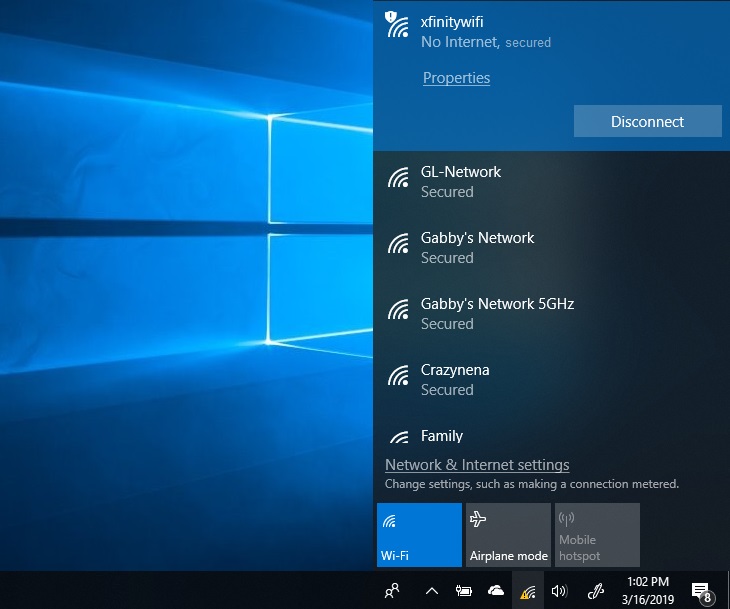
One of the worst situations for a user is when a person is connected to the internet but is unable to surf the internet. Websites fail to load and it becomes terrible for you to perform your tasks. Whenever this happens you shall see a yellow triangle and a message saying “No Internet, Secured”.
There are several reasons for this but the most common reason for this is the problem with the IP setting which impacts your connection. Like most of the errors for this due to the corrupt files installed during updating the operating system.
The “No Internet, Secured” message can be both puzzling and frustrating for anyone relying on a stable internet connection for work or leisure. It often appears when you are connected to a Wi-Fi network but can’t access the internet.
This comprehensive guide aims to demystify what “Internet Secured” means, delve into the root causes of this common issue, and provide actionable solutions, including how to secure your internet connection effectively.
What Does “Internet Secured” Mean?
When your device shows that the “Internet is Secured,” it indicates that a Wi-Fi connection has been successfully established and the network is protected by some form of encryption, usually WPA or WPA2.
In an ideal world, this message means you should be able to browse the web, stream videos, and so on. However, the “No Internet, Secured” message means that although you are connected to the router, you can’t access the internet.
Causes of “No Internet, Secured” Issue
Several factors can contribute to the occurrence of the “No Internet, Secured” message. Some common causes include:
- Faulty Network Configuration: Incorrect IP settings can disrupt the internet connection.
- Router or Modem Issues: Sometimes the problem lies in the hardware itself.
- ISP Outages: Service interruptions from your Internet Service Provider can result in this issue.
- Driver Problems: Outdated or incompatible network drivers can cause this message to appear.
- Firewall or Antivirus: Sometimes, security software can mistakenly block internet access.
How to No Internet Secured in Windows 10
To fix this problem, in this article we shall be talking about several ways to fix No Internet Secured error. It on you to sort out which one of them works best for you. No Internet Secured error is hard to figure out, you might need to try more than 1 solution.
Solution 1: Update Network Adapter
It’s common that an outdated driver can interrupt your system from connecting to the internet.
Step 1: First of all, press Windows + R, after the run dialog box, opens type “devmgmt.msc“. Press enter key and the device manager window will fire up.
Step 2: Next, in the window open network adapters. Right-click on network adapter used by your system and simply click update driver software.
Step 3: Following, click on update driver, select search automatically, windows shall look for the updated driver software.
Step 4: After these steps go to the network and sharing center. Then, right-click on the network icon in the notification area and simply choose the open network and sharing center.
Step 5: Then, navigate to change adapter setting and click.
Step 6: In the wireless network right click and choose properties.
Step 7: Uncheck Internet protocol 6 and disable it and click OK.
Step 8: At last, shut this window and restart your system.
Even after this if the internet is not working you can try uninstalling your network adapter.
Step 1: Firstly, open device manager and double click on network adapters.
Step 2: Secondly, search for the network adapter which is used by you for internet connection, right-click, and uninstall it.
Step 3: After this, there shall be a menu item called the action on the top right, when you click on it choose for scan for hardware changes. Now windows shall automatically look for the missing network adapter and install it.
Step 4: Lastly, restart the system once the installation is over.
Solution 2: Change the WiFi Properties
To change these settings follow the steps listed below.
Step 1: At first, press Windows+ R key. The run window will open, type the following “ncpa.cpl” and click OK. You shall see the network connection window on your screen. Put your connection in airplane mode.
Step 2: Select your WiFi connection and right-click. Select properties.
Step 3: In the dialogue box, check the following options
- Client for Microsoft networks
- File and printer sharing for Microsoft networks
- Link-layer topology discovery mapper I/O driver
- Internet Protocol version 4, or TCP/IPv4
- Internet Protocol version 6, or TCP/IPv6
- Link-layer topology discovery responder
Step 4: Click on the network icon and see the WiFi network that causing this error
Step 5: If there are any Ethernet cable connected to your PC detach the ethernet cable.
Step 6: Next, restart the router.
Step 7: At last, when the router is turned on, disable airplane mode, and try connecting to your WiFi network.
Solution 3: Disable WiFi Sharing
The router driver can sometimes have a conflict with the wireless driver.
Step 1: Firstly, open network adapters, right-click on the network you are using, and simply choose properties.
Step 2: Secondly, click on the sharing tab. Unmark “Microsoft network adapter multiplexor protocol” and other items related to WiFi sharing.
You may wonder which items are related to WiFi sharing, click on every item and you shall see its description. According to this uncheck the items accordingly.
Step 3: Lastly, close out the window and try reconnecting.
Solution 4: Modify the TCP/IP Properties
If No Internet, Secured problem persists, and if you are using Windows 10 creator’s update or Fall Creators Update, you can go for changing the TCP/IP setting.
Step 1: Press Windows + R key. Once the run windows fire up type “ncpa.cpl” and click OK.
Step 2: You shall see the network connections window.
Step 3: Search for your WiFi and right-click. Select properties. Select Internet Protocol Version 4.
Step 4: You’ll see some options, select Obtain an IP address automatically, and Obtain DNS server automatically.
Step 5: Now press the advanced button. This is on the bottom right of the dialog box. Go to the “WNS” tab.
Step 6: Scroll down and search for the NetBIOS setting, there shall be an option “Enable NetBIOS over TCP/IP” setting. Click OK on all the dialog boxes.
Close all the open windows, wait for some time, and open your network adapter again. Now the IPv4 connectivity should be in internet state and now you shall be able to access web pages.
Solution 5: Check Power Management Properties
Another reason you could be facing this issue can be due to power management settings. In the windows creators or fall creators update, No Internet Secured problem is commonly faced.
Step 1: First of all, press Windows + X.
Step 2: Secondly, look for the network adapters in the device manager.
Step 3: In the wireless network, go to the power management tab. Uncheck the option which says “Allow the computer to turn off this device to save power” option.
Step 4: Lastly, restart your system and see if you have internet connectivity back.
Why Is My Laptop Saying “No Internet”?
Your laptop may say “No Internet” due to the reasons listed above or because of additional issues like:
- Limited Connectivity: If the signal strength is weak, you may face limited or no internet access.
- DNS Issues: Problems with Domain Name System (DNS) settings can prevent you from accessing the internet.
- Operating System Glitches: Sometimes, bugs in the operating system can also cause these problems.
Why Does My Laptop Say “No Internet” but Wi-Fi Is Fine?
This can be especially perplexing. It often happens because your laptop is connected to the router but cannot access the wider internet, possibly due to:
- Static IP Address: If your device is configured with a static IP that doesn’t match the network range, it will not access the internet.
- Proxy Settings: Incorrect proxy settings can also cause this issue.
- Software Conflicts: Occasionally, third-party applications can interfere with your network settings.
How to Secure My Internet Connection
Securing your internet connection is crucial to ensuring both the privacy and safety of your online activities. Here are some recommendations:
- Use Strong Encryption: Opt for WPA3 encryption if your router supports it.
- Strong Password: Use a robust, unique password for your Wi-Fi network.
- Firewall: Enable a firewall on your router and your device.
- Regular Updates: Make sure your router firmware and device software are up-to-date.
- VPN: Consider using a Virtual Private Network (VPN) for added security.
- Disable WPS: The Wi-Fi Protected Setup (WPS) is often less secure, so it’s a good idea to disable it.
- Guest Network: If you have visitors, allow them to connect to a separate guest network to keep your primary network secure.
Read Next:
- The File is Too Large for the Destination File System
- Windows Could Not Detect This Network’s Proxy Settings
- No Sound on YouTube
- Discord No Route
Conclusion
The “No Internet Secured” issue is troublesome for everyone and no one wants to use their system without internet connectivity. In this article, we have tried to cover up all the key points which shall help you resolve this issue.
We wish that these solutions shall fix No Internet Secured error. In case if your problem remains unsolved feel free to contact us and we shall provide you with the best solution.


