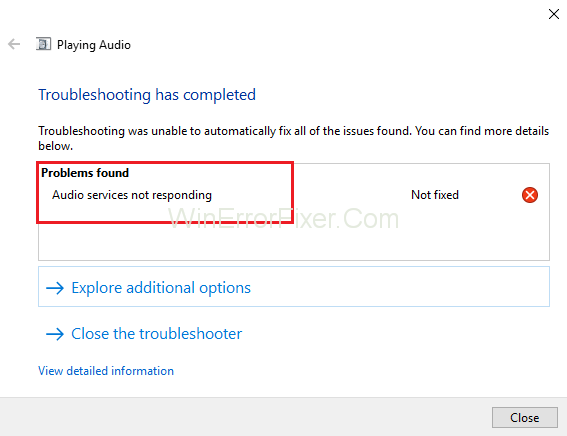
The error message “Audio services not responding” is an error that is generated by Windows sound troubleshooter that is usually run at the time you experience issues with the sound devices.
This error actually means that your sound device is in an unresponsive state and is not responding to your messages or your computer’s commands.
Audio Services Not Responding is a very common error. It generally occurs when you update your version of Windows using the Windows Update. There are some methods that can help in resolving Audio Services Not Responding issue.
If you’re a Windows user who has experienced the ‘Audio Services Not Responding’ error, you know how frustrating it can be when your audio suddenly stops working.
This comprehensive guide is designed to help you identify the causes of this error and provides effective solutions to restart, manually start, and restore your audio services, including how to reset Realtek audio.
Causes of Audio Services Not Responding
1. Corrupted Drivers
Outdated or corrupted audio drivers can lead to this error.
2. Windows Updates
Sometimes, a Windows update can disrupt audio services.
3. Third-Party Interference
Security software or third-party applications can conflict with Windows audio services.
4. Hardware Issues
Faulty audio equipment like speakers or headphones can cause the issue.
5. Incorrect Configuration
Improperly configured audio settings may also lead to this problem.
How to Fix Audio Services Not Responding in Windows 10
These methods include ensuring that the drivers are updated to their latest build and all of the audio services are running as expected. In case these methods don’t fix the situation, you have to resort to a system restore.
Solution 1: Restarting Audio Services
Before jumping onto complex and extensive solutions, you should start by trying to restart the audio service. There is an audio service present alongside your sound hardware and drivers that is responsible for managing the audio on your PC. A simple rebooting will reboot its configurations and can fix the Audio Services Not Responding issue at hand:
Step 1: First of all, press the Windows + R key combination to open Run. Then type “services.msc” and then press the Enter key.
Step 2: Once in services, go through all the entries until you see “Windows Audio”. Now, right-click on it and then click on “Restart”.
Step 3: Then right- click on the entry again and click on Properties. Now, set the startup type as “Automatic”. Finally, click on Apply to save the made changes and then Exit.
Step 4: Now, navigate back to services and find the Windows Audio Endpoint Builder. Right-click on it and then click on Start.
Step 5: Once the process is started, open its properties and set the startup type as Automatic. Click on Apply in order to save changes and then Exit.
Step 6: At last, reboot your PC and see if the Audio Services Not Responding issue still persists.
Solution 2: Installing Realtek or High Definition Audio Device
A lot of users reported that installing a High Definition Audio Device Driver in the place of IDT High Definition Audio CODEC, etc. resolved this issue for them. You can try this method before you resort to a system restore or perform a clean installation.
Step 1: First of all, press Windows + X key combination in order to launch the quick start menu and then click on Device Manager from the list of options shown.
Step 2: Expand the “Sound, video and game controllers” category, once in the Device Manager.
Step 3: Now, right-click on the sound device and then click on Update Driver after which an option will come forward asking whether to install the driver manually or automatically. Click on Browse my computer for driver software option.
Step 4: Then click on the option of Let me pick from a list of available drivers on my computer.
Step 5: Now, uncheck the option that says “show compatible hardware” to make sure that all the results are listed in the driver list. Go through all the drivers till you see High Definition Audio Device and then click on it and press Next.
Step 6: Follow the instructions given on the screen in order to complete the installation process. Reboot the computer and see if the issue has been resolved or not.
Note: If this method doesn’t work then you should try to download the drivers from the manufacturer’s official website. Now, install them using the method given above. Doing so fixed the problem in many cases.
Solution 3: Check Audio Components
Before assuming that the problem is technical, ensure that all the audio components are running. In case any of them is not working, it can be the reason why the Audio Services Not Responding error message is popping up.
Also, try disabling your antivirus software as at times they block some innocent programs which can cause you sufferings. These are services and their exclusion can cause discrepancies.
Step 1: First of all, press the Windows + R key combination to open Run windows.
Step 2: Type “services.msc” in the Run window and then press the Enter key.
Step 3: Now, ensure that the services given below are still in the running state. If the services are not running, right-click on them and then click on Start.
RPC Endpoint Mapper
Remote Procedure Call (RPC)
DCOM Server Process Launcher
Step 4: Also ensure that all of these services have been set to start as “Automatic”.
Step 5: Once the processes have started (in case they were off), see if the problem at hand got resolved or not. If the problem persists, you can try rebooting your computer system and checking again.
Solution 4: Executing some Command Prompt Instructions
If the checks were correct on your computer and both the above-described methods didn’t work for you then you can try executing some elevated instructions of command prompt.
Note: An administrative account will be needed to carry out this operation.
Step 1: First of all, use Windows + S key combination and then type “command prompt” and right-click the app and then click on “Run as administrator” option.
Step 2: Once in an elevated command prompt, type the command given below and then press Enter:
Net localgroup
Administrators /add
Network service
Step 3: Then, type the command given below and again press the Enter key:
Net localgroup
Administrators /add
localservice
Step 4: Once both these steps are executed, type “exit” and then press the Enter key.
Step 5: Finally, reboot your computer system and see if the Audio Services Not Responding problem still persists or not.
Solution 5: Installing Default Sound Drivers
Your Operating system keeps upgrading time to time to its latest version. Sound drivers are also included in the majority of the packages and they get upgraded over time.
The computer system possesses a basic default driver saved already on it so, whenever the current sound drivers are uninstalled, the system recognizes the hardware connected and then installs the required driver. You can try installing the default drivers on your PC to rectify this situation:
Step 1: First of all, press the Windows + S key combination in order to launch the search menu of the start bar. Now, type “system” in the shown dialogue box and then click on the first item that returns in the result.
Step 2: Once in the system, on the left side of the screen, click on “Advanced system settings” option.
Step 3: Go to the Hardware tab and then click on the option of Device Installation Settings.
Step 4: Now, Click on the option that says “No (your device might not work as expected)”. Then press Save changes and exit. This will disable the Windows update and prevent it from updating the audio drivers automatically.
Note: If this method doesn’t work for you, then ensure that you change the option back to “Yes” again.
Step 5: Then press Windows + X key combination to open the quick start menu and then click on “Device Manager” present in the list of options that are available.
Step 6: Expand the “Sound, video and game controllers” category, once in the Device Manager.
Step 7: Then right-click on the sound device and click on “Uninstall Device”.
Step 8: Now, check the uninstalled driver checkbox in order to uninstall the driver too and then proceed with the uninstallation process.
Step 9: Once the device has been uninstalled, right-click any empty space on the Device Manager and then click on “Scan for hardware changes”. Now your system will detect the audio hardware on your PC and then automatically install the default drivers present on your system.
Step 10: At last, see if this makes any difference. Finally, restart your computer after the installation of the default drivers is complete.
Solution 6: Restore from last Restore Point/Doing a Clean Install
If all the above-described methods failed to rectify the situation then you are left with no other choice than to restore your Windows to the last restore point. In case you do not have a restore point, you can try installing a clean version of Windows.
In order to backup your data by using external storage, get all your licenses saved you can use the utility “Belarc” after that you can go for a clean install.
Given below are steps to restore Windows from the last restore point:
Step 1: Firstly, press the Windows + S key combination to open the start menu search bar, then type “restore” in the box and then click on the first program in the result list.
Step 2: Once the Restore settings open, click on System Restore located under the tab of System Protection at the beginning of the Window.
Step 3: A wizard will open and it will navigate you through all the steps for restoring your system. Now, click on Next and then carry on with further instructions.
Step 4: Then click on Select the restore point from the list of the options present. In case you have more than one restore point, all of them will be listed there.
Step 5: After that Windows will confirm your actions one last time before starting the system restore process. It is recommended to save all your work. Take a backup of crucial data just in case and then proceed with the process.
Step 6: Once the restorations have completed successfully, log into the system. Check if the Audio Services Not Responding error has disappeared or not.
How to Restart Audio Services Not Responding
Solution 1: Through Services Window
- Press
Windows + Rand typeservices.mscto open the Services window. - Scroll down to find “Windows Audio” and right-click on it.
- Select ‘Restart’.
Solution 2: Using Command Prompt
- Open Command Prompt as an administrator.
- Type
net stop audiosrvand press Enter. - Then type
net start audiosrvand press Enter.
How to Manually Start Audio Services
- Press
Windows + Rand typeservices.msc. - Locate “Windows Audio” and right-click on it.
- Select ‘Start’.
How to Reset Realtek Audio
- Open Device Manager by pressing
Windows + Xand selecting it from the list. - Expand the ‘Sound, video and game controllers’ section.
- Right-click on ‘Realtek High Definition Audio’ and select ‘Uninstall device’.
- Restart your computer. Windows will automatically reinstall the Realtek drivers.
How to Restore Windows Audio Services
Method 1: Using Command Prompt
- Open Command Prompt as an administrator.
- Type
sfc /scannowto scan and repair corrupted system files that may affect audio services.
Method 2: Reinstalling Audio Drivers
- Open Device Manager.
- Locate your audio device under ‘Sound, video and game controllers’.
- Right-click and select ‘Uninstall device’.
- Restart your computer to reinstall the drivers.
Recommended:
Conclusion
Go through the guide with an alert mind. Follow the steps meticulously, start with Method 1 and work all the way down until one of the methods rectifies the situation. Hope this guide proves useful to you.
The ‘Audio Services Not Responding’ error can be a result of various issues ranging from corrupted drivers to incorrect configurations. While this can be a nuisance, the steps outlined in this guide should help you get your audio back up and running. From manually starting audio services to resetting Realtek audio, there are multiple solutions to consider.


