Windows network error 0x800704cf is one of the common errors faced by Windows users on their operating system. This error pops up with a message that reads: Error code: 0x800704cf. The network location cannot be reached. This is a network error and generally arises when users try to connect to PCs, sync accounts on their device, or while updating the Windows operating system.
Windows 10 has the Network and Sharing Center which works as the main location for all the networking operations, but unfortunately, most of the users are facing this error while accessing the Network center or the workgroup which is of the utmost importance in sharing files, network storage, modifying settings and connecting resources. Indeed, it becomes more annoying when you have some urgent task and the error pops up in between.
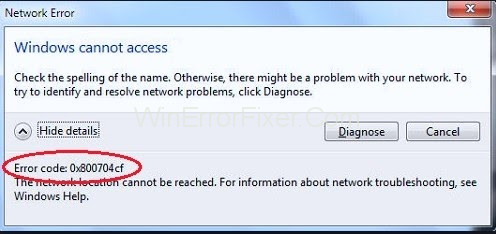
Firstly, we recommend you to run a “diagnose” because for many users this has worked. With the error message, you will find a button diagnose at the bottom. Click on it and then follow the on-screen instructions. This will diagnose the error which is interfering with the network center or workgroup and will fix all the critical issues. If the error still persists, then there is no need to worry as repairing these Windows glitches are easier than you think.
How to Fix Error Code 0x800704cf in Windows 10
Here is a complete guide for you in which we will throw light on all the possible workarounds to fix the issue. What you have to do is to follow the instructions and soon you will be able to get rid of the issue.
Solution 1: Change Adapter Settings
Many users have reported that after they have changed the adapter settings, the Windows network error 0x800704cf message stopped popping up. You are also recommended to do the same as it is the most efficient method in resolving this issue. So, follow these steps to change the adapter settings:
Step 1: Press Windows key + I hotkey to open the Settings and then select Network and Internet option. From Change your network settings section, click on Change adapter options.
Step 2: You will find a list of all the network connections available, right-click on the network you are connected with, and then click on Properties from the context menu.
Step 3: Now, uncheck the Client for Microsoft Networks option and then click on OK to save the changes.
Now, reboot your PC and check whether the error still pops up or it has been resolved.
Solution 2: Reset TCP/IP
If changing the adapter settings didn’t work out, then try resetting the TCP/IP (Transmission Control Protocol/Internet Protocol) which will require you to execute few commands on Command prompt. To do so, go through these steps:
Step 1: Firstly, go to the Start menu. Type cmd in the Search tab and press Enter. Right-click on the Command Prompt option and choose Run as administrator from the context menu.
Step 2: Command Prompt window will open up. Type the ipconfig /flushdns command and press Enter. This will flush the DNS Resolver cache that might be the reason behind the error.
Step 3: Proceeding with this, execute the nbtstat –RR command, this will refresh all the NetBIOS names registered by your computer.
Step 4: Finally, execute these commands and press Enter after executing each command.
netsh int ip reset
netsh winsock reset
After executing all the commands successfully, exit the command prompt and restart your PC to save the changes.
Hopefully, the error will not pop up again and you would be able to resolve the issue. If the error still shows up, then try applying the next method.
Solution 3: Reinstall Network Adapters
If you have reached so far and is still unable to solve the issue, then there is only one alternative left, i.e. Reinstalling the network adapters installed in your PC.
Undoubtedly, this is a network connectivity issue, and it could be most probably due to the network adapters used. Now what you have to do is to figure out whether you are using a well-functioning driver or a corrupted one. If the driver turns out to be corrupted then we strongly recommend you to re-install the Network Adapter. Here is how to do so:
Step 1: Press Windows key + R hotkey to open the Run window. In the text box, input devmgmt.msc and then press OK to open the Device Manager window. Alternatively, you can also go to the start menu and type Control Panel. From the control panel window, select Hardware and Sound. From the options in Devices and Printers, select Device Manager.
Step 2: From the window that opens up, click on the View tab, and choose the Choose hidden devices option from the context menu. Now, double click on Network Adaptors and expand the drop-down.
Step 3: You will find a list of all the adapters installed on your PC. Right-click on each adapter and click on the Uninstall device option. Click on OK when it prompts to uninstall the device.
Step 4: After uninstalling all the adapters, click on the Scan for hardware changes button at the top of the window. This will search for correct adapters and then you need to install them.
Step 5: After completion of the process, all the successfully reinstalled adapters will show up under the Network Adapters.
Now, reboot your PC and check whether the issue has been resolved or not. If the issue is still not resolved, then contact your windows networking service.
Conclusion
Windows contains several minor bugs and glitches and one of them is the Windows network error 0x800704cf. We have discussed every possible cause of the error and the solution to fix the same.
Hopefully, you would be able to resolve the issue after applying the above methods systematically. Moreover, if you are still unable to fix the issue, then we recommend you to contact the Windows support to assist you further.


