Updating Windows is a very crucial habit to make your Windows work most efficiently however, it can be a real headache if number of different errors like error 0x80070020 pops up in the process.
0x80070020 Error occurs when some program interferes with the automatic update process or in some cases can be a result of antivirus programs that uses real-time scanning. There can also be a system file or disk errors triggering it.
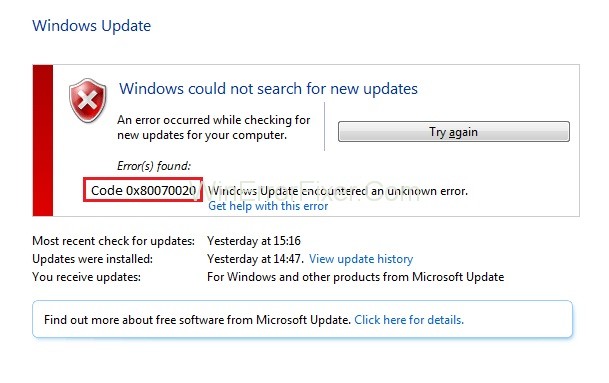
Error code 0x80070020 is one of those error messages that Windows users, including those on Windows Server, dread encountering. Usually related to Windows Update, this error can be caused by various issues, affecting system performance and crucial updates.
In this comprehensive guide, we delve into what the 0x80070020 error is, its common causes, its impact on Windows Server, and how to clear the Windows Update cache to potentially resolve it. If you want to solve your problems easily So, Continue read our Fully “How To Fix ‘0x80070020’ Windows Update Error” Article And Solve Your Problem Easily.
What is 0x80070020?
The 0x80070020 error is typically associated with Windows Update and is often encountered when the system fails to install updates. This error message essentially means that the system was unable to gain access to a specific file it needed due to it being in use by another process.
While common in consumer versions of Windows, it is also seen in Windows Server environments, posing unique challenges for system administrators.
Common Causes of 0x80070020 Error
1. File Conflicts
Often, the error occurs due to file conflicts when another process is using the file that Windows Update is trying to modify or access.
2. Antivirus Software
Security software may interfere with Windows Update, blocking certain actions and triggering the error.
3. Corrupted Update Files
Incomplete or corrupted update files can cause this error, making it impossible for Windows to complete the update.
4. User Permissions
Sometimes, lack of administrative permissions can cause this error, as restricted users might not have the clearance to execute updates.
Fix: Windows Update Error 0x80070020
Here we are providing some fixes for this Error 0x80070020 in Windows 10 which will keep your Windows updated.
Solution 1: Running the Windows Update Troubleshooter
Before jumping into the more complex solutions of fixing this error first try to use the built-in tool which is the Windows Update Trouble shooter. Windows contains some trouble shooters designed to automatically solve various computer problems.
They cannot solve all the problems, but you should give priority to this before you jump into other methods. To start troubleshooting follow the given steps:
Step 1: Go to “Settings” by Pressing Windows + I
Step 2: Find “troubleshoot” option by typing it in the search menu and select “Troubleshoot” from the list.
Step 3: Then select the Windows Update and run the troubleshooter.
While it scans for issues follow all the instructions to resolve the issue. After the process, run the Windows Update again to see if the problem is fixed or not.
Solution 2: Reset Windows Update Components
When users face trouble using Windows Update frequently then it is advised to reset Windows Update settings to default. To do that –
Step 1: Press the search button on the taskbar and type cmd in it and select Command Prompt from it.
Step 2: Open it as an administrator and type the following commands in the elevated command prompt type. Press Enter after each command:
net stop bits
net stop wuauserv
net stop msiserver
net stop cryptsvc
These commands will stop the Windows related services.
If you are trying to resolve your Windows Update issues by this method it is advisable to skip this step.
Step 3: Now to reset the Windows Update components, you have to delete the qmgr*.dat files. For that type this command and press Enter:
Del "%ALLUSERSPROFILE%\Application Data\Microsoft\Network\Downloader\qmgr*.dat".
Step 4: Now we have to rename the Software Distribution and catroot2 folders, for that type the following commands and press Enter after typing each of them:
%systemroot%\SoftwareDistribution SoftwareDistribution.bak
ren %systemroot%\system32\catroot2 catroot2.bak
Step 5: After renaming the folders we need to restart the BITS, Cryptographic, MSI Installer and the Windows Update Services that we stopped earlier. For that, type the following commands and don’t forget to press Enter after typing each of them:
net start bits
net start wuauserv
net start msiserver
net start cryptsvc
Now Restart the Computer and try to Update to check if the problem is solved or not.
Implications of Error 0x80070020 on Windows Server
1. Security Risks
Failure to update Windows Server can lead to potential security risks, exposing the system to vulnerabilities.
2. System Instability
If essential updates are not installed, it can lead to system instability, affecting the performance and reliability of server tasks.
3. Operational Downtime
Failure to resolve this error quickly can lead to operational downtime, impacting business continuity and services.
How to Clear Windows Update Cache
1. Stop Windows Update Service
- Open the command prompt as an administrator and type
net stop wuauserv.
2. Delete Cache Files
- Navigate to
C:\Windows\SoftwareDistribution\Downloadand delete all the files in this folder.
3. Restart Windows Update Service
- Go back to the command prompt and type
net start wuauserv.
4. Run Windows Update Again
- Open Windows Update and try running the update process again.
Similar Posts
- Error 0x80300024 When Installing Windows
- 0x8024200D Update Failure Error in Windows 10
- Windows Update Error Code 0x800705b4 Error
- Windows Update Error Code 0x8024a105 Error
Conclusion
We hope that these methods work efficiently for you and you are able to install Windows Updates without any trouble.
Error 0x80070020 is a frustrating but common issue that Windows users encounter, especially when dealing with Windows Updates. The error can arise due to various causes such as file conflicts, antivirus interference, corrupted files, or user permission issues.
On Windows Server, it poses unique challenges like security vulnerabilities and operational downtime. Clearing the Windows Update cache is one of the recommended solutions to resolve this issue. Thanks For Read the Our Fully “How To Fix ‘0x80070020’ Windows Update Error” Article.
Note: Always ensure to consult official guidelines and documentation for the most accurate and up-to-date information. Exercise caution when modifying system settings or files.
Happy Reading!


