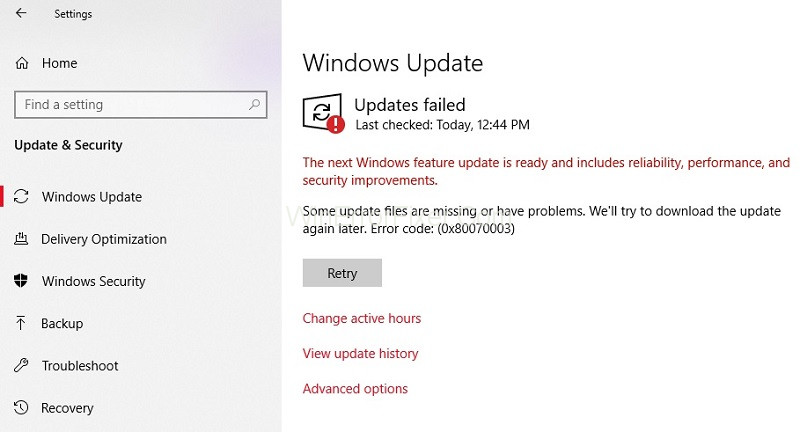
If you are trying to update your Windows from 8 to 10 or from an older version to Windows 10, then you might face the error code 0x80070003. The update usually stops at 50 percent, and this error message is displayed on your screen.
Yes, it is highly irritating, we know, but you are not the only one facing this problem. We are here today to discuss this error and then provide valid solutions for this error so go through the following article thoroughly without skipping, please.
Encountering an error on your Windows computer can be a frustrating experience. The 0x80070003 error, in particular, is one that has puzzled many users. This detailed guide is here to shed light on the causes and solutions of the 0x80070003 error, providing a roadmap to smoother operations.
What is 0x80070003?
The error code 0x80070003 is an error that typically pops up in the Windows environment. It usually signifies that there are issues related to file mismatches or file corruption during specific operations, particularly during Windows updates. This error can also be seen in other contexts, such as system restores or credential management.
Causes of 0x80070003 Windows Update Error:
- File Corruption: One of the leading causes is corrupted system files. These may be integral for the update process, and any corruption can halt this.
- Faulty Windows Update Components: Sometimes, specific components related to Windows Update might malfunction, leading to the error.
- Disk Errors: Disk-related issues or bad sectors can prevent the reading or writing of necessary update files.
How to Fix Windows Update Error 0x80070003
You can fix Error Code: 0x80070003 simply by any of the following methods. You can try all of them, and one of them is definitely going to hit the bullseye. So without much further ado, let’s get right into it.
Solution 1: Run the Windows Update Troubleshooter
To run the Windows Update troubleshooter, follow the following steps:
Step 1: Download Windows Update Troubleshooter. You can easily find it on the internet. I’m sure we all know how to download stuff. Even a novice can do it. Let the download finish before proceeding to the next step.
Step 2: Find the troubleshooter from the directory that you downloaded it at. Right-click on it and select ‘Run as Administrator’ from the options that appear. Tap on the yes button if you find that a user account control message is displayed.
Step 3: After that, the installation process will start. You need to follow the on-screen information step by step to complete the installation process. Make sure to reboot your computer after the installation process is complete.
Step 4: Try to update your operating system from Windows 8.1 to Windows 10.
If you find that your update is completed without the error, then good, your problem is solved, but if the error message still appears, then read on to the next solution. Please do not freak out because there are many other solutions available.
Solution 2: Restart or stop the Windows Update Service
To do this, you have to follow the following steps:
Step 1: Using your mouse move your cursor to a blank area on the desktop. Right-click on it and select the Search option. Once the search dialog box opens, use your keyboard to type in Control Panel.
Step 2: Wait until the complete search. Select the control panel, and the control panel dialog box will appear. Type in ‘Administrative Tools’ in the search box appears on the screen in the control panel dialog box. Don’t use quotations.
Step 3: Select the Administrative Tools features and then double click on the ‘Services’ option. You can be asked for an administrator password and account. Type in the required details.
Step 4: In the list that appears, search for Windows update. After that, right-click and hold on the Windows Update service.
Step 5: Tap on the stop button from the menu.
Step 6: Restart your computer.
Step 7: Try to update your operating system once again.
If you find that the problem is not solved, then you can move on to the next solution, but if your operating system gets updated without displaying the error 0x80070003 message, then good for you. You have solved the error.
Solution 3: Delete the DataStore folder
To do this, follow the following steps:
Step 1: Open Files Explorer.
Step 2: Open the Drive where your operating system is installed. Open the Windows folder and then search for the Software Distribution folder.
Step 3: Once it opens, navigate to the Data Store folder. Delete the files present there. Go back to the Software Distribution folder.
Step 4: Click the Download folder to open it and delete all the files and folders in there too.
Step 5: Reboot your system and start the update again.
Step 6: Move your mouse cursor on the desktop and right-click on it. Click on the search button and then enter the control panel in the dialog box.
Step 7: Once the control panel opens, click on the search box and enter administrative tools in there. After the complete search, click on the Administrative Tools icon and selects the Services option. Find the Windows Update service and right-click on it.
Step 8: From the menu that appears, click on the start option.
Step 9: Once again, try to update your operating system.
If you find that your error is resolved or not occurring, then congratulations you have done a great job and successfully solved the error on your own without any professional help.
You can now easily update your operating system once again without any error message displayed on your screen.
If this is not the case and you are still struggling with the error, then worry not because we have a few other solutions at our disposal too. Let’s move on to the next solution.
Solution 4: Restart Windows Update in Command Prompt
Follow the following steps:
Step 1: Click on the Command Prompt Admin feature and open it. If you find that you need to enter your administrator account and password, then fill in the details as required.
Step 2: Type in the command prompt dialog box – net stop wuauserv. Press enter on the keyboard.
Step 3: Then type in the command prompt dialog box – net stop bits. Press enter once again without any hesitation.
Step 4: Reboot your device. After rebooting, you need to open your command prompt dialog box once again in a similar way.
Step 5: Type in the command prompt dialog box – net start wuauserv. Press enter on the keyboard.
Step 6: Then type in the command prompt dialog box – net start bits. Press enter once again without any further ado.
Step 7: Try to update your operating system once again.
If you see that your error is resolved then it is good for you since you do not have to read further on. We know it is time-consuming.
But if by a stroke of bad luck, the error message is still displayed, making it unable for you to update your operating system from Windows 8.1 to Windows 10, then worry not, we still have one solution left.
Solution 5: Run DISM
To do this, follow the following steps:
Step 1: Press the Windows key + X button.
Step 2: Once again, from the menu, select the Command Prompt (Admin)
Step 3: Type in the command prompt dialog box – Dism/ Online/ Clean-up Image/ Scan Health. Press Enter on the keyboard.
Step 4: Once again, without any further ado, type in the command prompt dialog box – Dism/ Online/ Clean-up Image/ Restore Health. Press enter on again.
Step 5: Please wait for a few minutes for the process to complete. It will take near about ten minutes.
Step 6: After the complete process, reboot your device. After rebooting, check for your update and see if the error persists or not.
This was the last and least option that you could have tried. If none of the above-mentioned solutions worked out, you need to contact a professional or seek help from Windows customer service support.
Error 0x80070003 in Credential Manager:
When this error appears in the context of the Credential Manager, it usually means there’s an issue accessing, reading, or storing credentials due to file system discrepancies or other system errors.
Error Code 0x80070003 on System Restore:
In a system restore scenario, the 0x80070003 error might pop up if:
- The restore point was not created correctly.
- System files associated with the restore point are corrupted.
- There’s an issue accessing the location where the restore point data is stored.
How to Clear Windows Update Cache:
One common solution to resolve various update-related issues, including the 0x80070003 error, is to clear the Windows Update cache. Here’s a step-by-step guide:
- Stop the Windows Update Service:
- Press the
Windows key + Rto open the Run dialog. - Type
services.mscand press Enter. - Scroll down and find the
Windows Updateservice. - Right-click on it and select
Stop.
- Press the
- Clear the Cache:
- Navigate to
C:\Windows\SoftwareDistribution\DataStore. - Delete all the files and folders within the
DataStorefolder. - Next, navigate to
C:\Windows\SoftwareDistribution\Downloadand delete everything in theDownloadfolder.
- Navigate to
- Restart the Windows Update Service:
- Return to the services list as before.
- Right-click on the
Windows Updateservice and selectStart.
- Run Windows Update Again: Once you’ve cleared the cache and restarted the service, try running Windows Update again.
Conclusion
We hope this article has been useful for you and that you have resolved error code 0x80070003 on your device. If not, then no need to panic. You can easily manage to contact the windows customer support service. They will find out a solution for you.
The 0x80070003 error in Windows is typically linked to file discrepancies or corruptions. Depending on the context — be it Windows update, system restore, or credential management — the solutions might vary.
Clearing the Windows Update cache is a commonly suggested remedy for update-related instances of the error. As always, ensure regular backups of your data to mitigate any potential data loss, and stay updated with the latest Windows patches and fixes.


