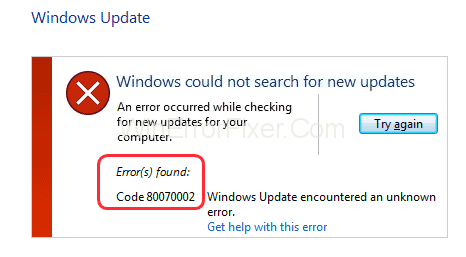
The Windows update error 0X80070002, as the name suggests, usually occurs after the update is downloaded due to a missing or corrupted file in the database. Windows update is a Microsoft service that automatically downloads and installs software updates in a system from the internet. These updates provide various kinds of system services, such as the latest security patches, additional features, and much more.
Causes of Error Code 0X80070002 in Windows 10
The primary causes of this problem are basically grouped into the same category that is related to the Windows Update package downloaded via the internet.
- The system fails to load or verify files from the Windows Update.
- The system has problems transmitting all the files from the source during installation.
- The default security provider of the system has been modified automatically or manually.
- The Drive partition of the default system load has been modified or changed to another.
How to Fix Windows Update Error 0X80070002
Usually, error code 0X80070002 can be fixed via multiple methods, but here in this article only the most efficient and easiest have been discussed. The solutions have the same final outcome so try out the ones that suit your preferences the most.
Method 1: Check The Date And Time Settings
This solution has been long ridiculed by many users as not viable or effective to counter problems related to updates.
Unfortunately, these users don’t know that the system’s time and date synchronize with the internet to sequence important operations performed on the computer. This allows the system to download precise data packages from the internet.
To set your time and date in sync with the internet’s time server, follow these steps:
Step 1: Right-click above the time and date notification shown on the bottom right corner of the windows screen.
Step 2: Choose “Adjust date/time”.
Step 3: Click on “Sync now” under the Synchronize your clock.
Step 4: Wait for a few seconds and it should be set.
Note: Active internet connection is required to sync time and date.
Method 2: Modify The Windows Update Installation Files
What if there is nothing wrong with the Windows Update procedure that you’ve been trying out, but instead, it is the process that is failing automatically due to corrupt files. In this case, the files need to be uninstalled correctly or renamed to perform the whole process without any problems. Follow the steps given below to successfully apply this method.
1. Disable The Windows Update Service
To disable Windows Update Service temporarily until the latest version is installed can be done in the following way.
Step 1: Open Settings from the Start Menu.
Step 2: Click on the “Update & Security” tab.
Step 3: Click on “Windows Update” from the panel on the left side.
Step 4: Go to the Advanced Options button and click on it.
Step 5: Under the “Pause updates” tab, select the drop-down menu from the Pause until section and choose a date to resume later.
Step 6: Restart the computer.
Run the Windows Update manually again and check if it’s installing or not.
2. Delete The Software Distribution Folder
Before going forward with this fix, it is important to stop Update services. Follow the steps carefully.
Step 1: Go to the Start menu and search for “cmd”.
Step 2: Run it as an administrator.
Step 3: Type the following command individually to stop Windows Update Service and Background Transfer service, respectively.
net stop wuauserv
net stop bits
Step 4: Hit Enter after each line individually.
Step 5: Using the given path, go to the contents of the Software Distribution folder.
C:\Windows\SoftwareDistribution
Step 6: Delete everything inside the Software Distribution folder.
Step 7: Again, go to the Start menu and search for “cmd”.
Step 8: Run it as an administrator.
Step 9: Type the following command individually to start Windows Update Service and Background Transfer service, respectively.
net start wuauserv
net start bits
Step 10: Hit Enter and restart the computer. The system should re-download the deleted files automatically.
3. Re-Enable The Windows Update Service
Step 1: Go to the start menu and search for “Services”.
Step 2: Scroll down and find the “Windows Update” service name.
Step 3: Right-click on the name and click on “Start”.
Step 4: Restart the computer.
This should enable auto-installation of the updates for the system.
Method 3: Try Windows Update Troubleshooter
The Windows Troubleshooter is a feature of Microsoft Windows that provides a tool to automatically detect common problems and solve them without the user having to do any kind of manual work. Follow these steps to launch the troubleshooter.
1. Online Method
Step 1: Click on the link.
Step 2: Scroll down and click on the “Check for Windows updates” button.
Step 3: Press OK on the pop-up box.
Step 4: Install the updates if available.
This will automatically check for available updates and notify the user.
Note: Active internet connection is required for the process.
2. Online Method
Step 1: Go to the Start menu and open Settings.
Step 2: Click on the “Update & Security” tab.
Step 3: Select “Troubleshoot” from the panel on the left side.
Step 4: Under the Getup and running section, click on the “Windows update” option.
Step 5: Click on “Run the troubleshooter”.
Step 6: Let the troubleshooter do its work and bring up results. It will fix any problems that can be detected.
Step 7: Restart the system.
This is the most straight-forward solution and hardly takes up more than 5-10 minutes.
Method 4: Modify Registry Editor
The Windows Operating System contains a registry, which is basically a database that stores information for low-level settings used by various applications on the system. Sometimes, the database files might get corrupted and disrupt the normal functioning of the system. This can be fixed by repairing the registry files.
This particular fix should be performed by an experienced administrator only, as it can change the way your system functions completely.
Step 1: Go to the Start menu and search for “regedit”. Or press the Windows Key + R to open up the Run windows and search for “regedit” there.
Step 2: Navigate to the following location inside the Registry Editor app.
HKEY_LOCAL_MACHINE > SOFTWARE > Microsoft > Windows > Current Version > Windows Update > Auto Update
Step 2: Select the AU Options and check it for its value and ensure that its 0 and not 1, which disables Auto updates.
Step 3: The OS update key can also be created.
Step 4: Right-click on the empty field and choose “New”.
Step 5: Choose “DWORD (32-bit) Value”.
Step 6: Again, right-click on it and choose to Modify.
Step 7: Change the Value name to “AllowOSUpgrade” and set the value data to 1.
Step 8: Select the Hexadecimal option and click on Ok.
Step 9: Restart the computer.
Auto Updates should be working now, and any Windows update, if available, will be downloaded and installed automatically.
Conclusion
The Windows Update Error 0x80070002 is a very common yet persistent error that users might face if not dealt properly with. This error becomes relatively harder to fix for users with less technical information.
Hence, this article provides simple yet effective ways to deal with this problem in the long run. Error Code 0X80070002 is very easy to fix. Users should not be scared because the problem itself is very much related to software issues. Thus, it also relieves the customer of any financial investment to fix this problem contrast to hardware problems.


